This kit was something that I had put aside for a very long time, waiting until I felt I had the tools and skills to do it justice. And finally, on Gundam’s 40th anniversary, I felt it was the right time to build this kit.
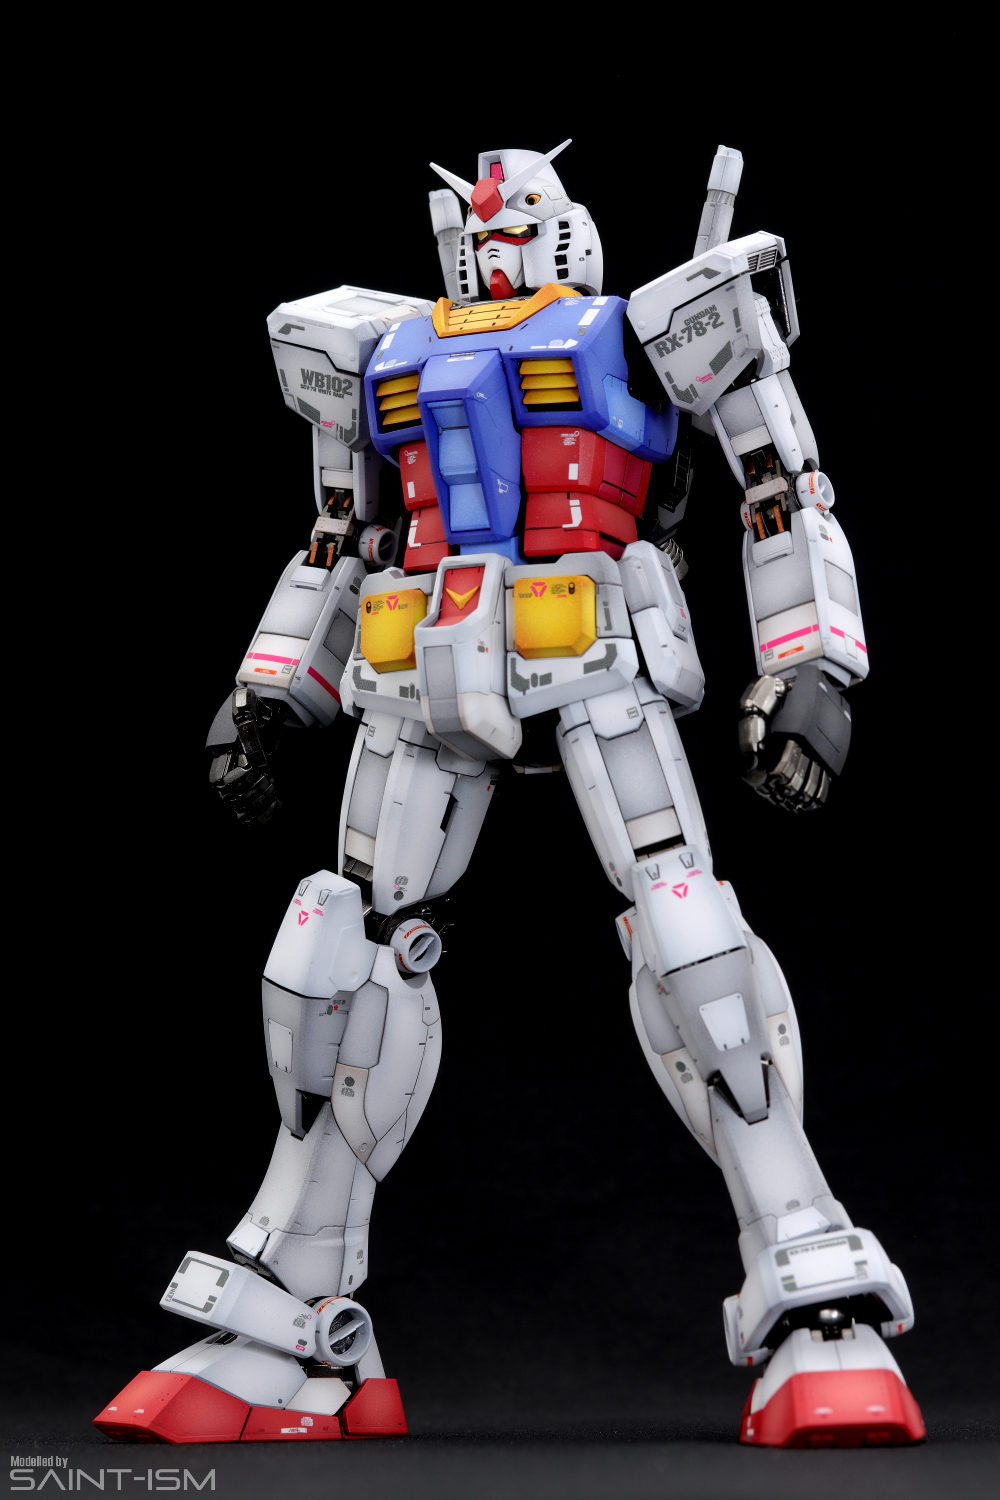
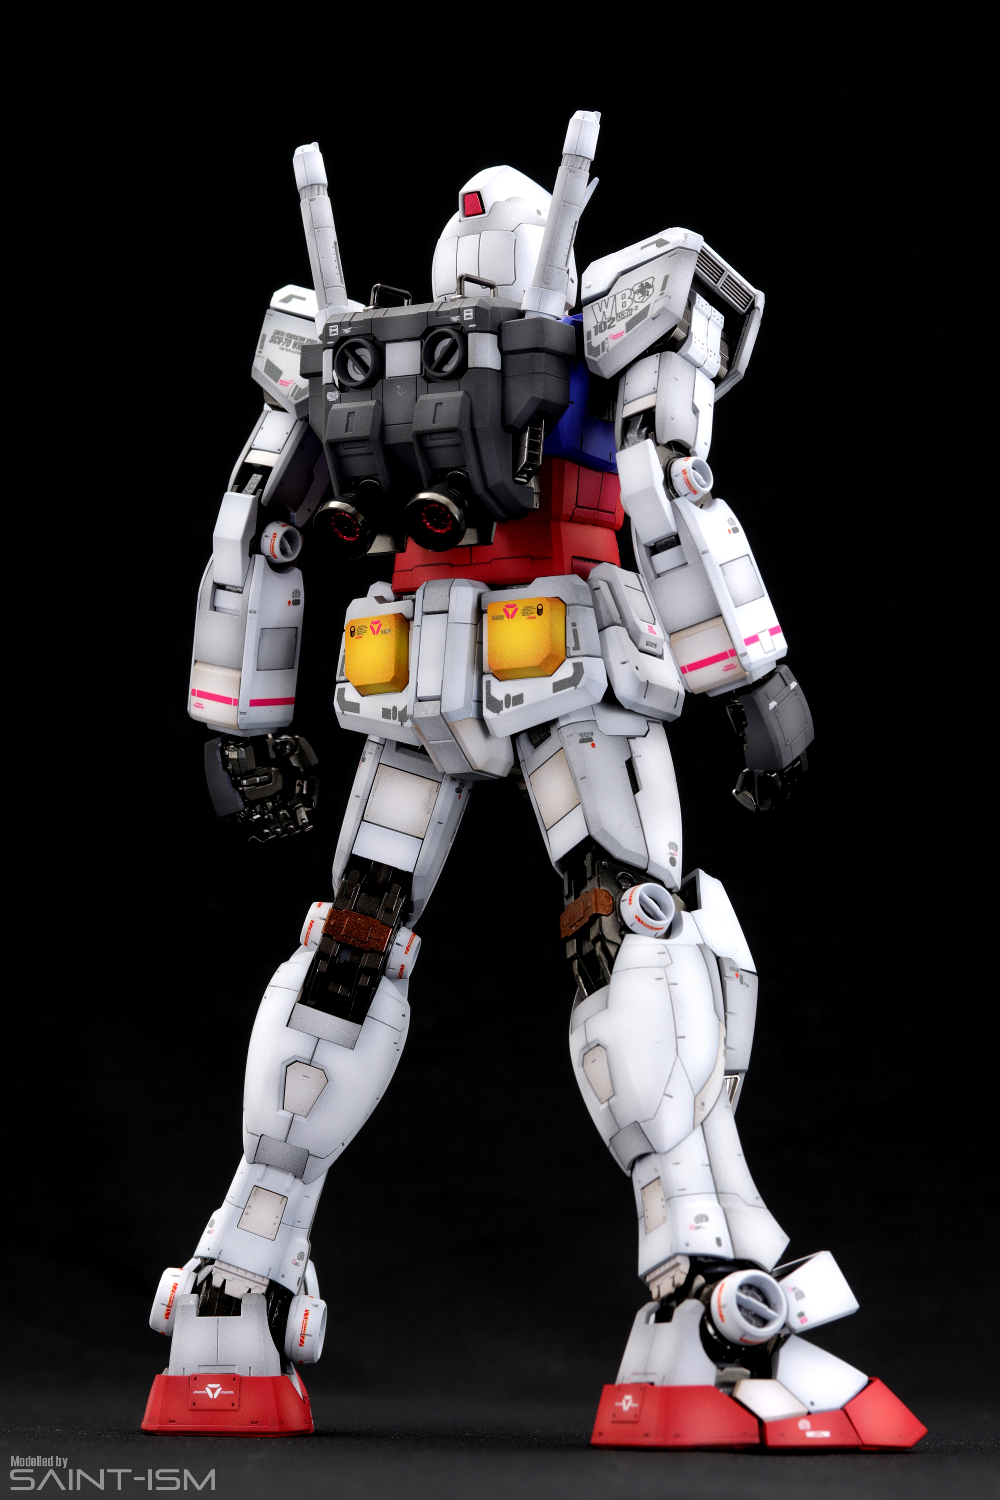
The design itself is just the RG kit blown up to 1/100 scale with better articulation. The panel separation is amazing on this kit which made it an absolute joy to paint. I found the arms a bit troublesome to build though, which is put together using some kind of double hook system for the elbow. They tend to pop out and lock if the arm is flexed too much.
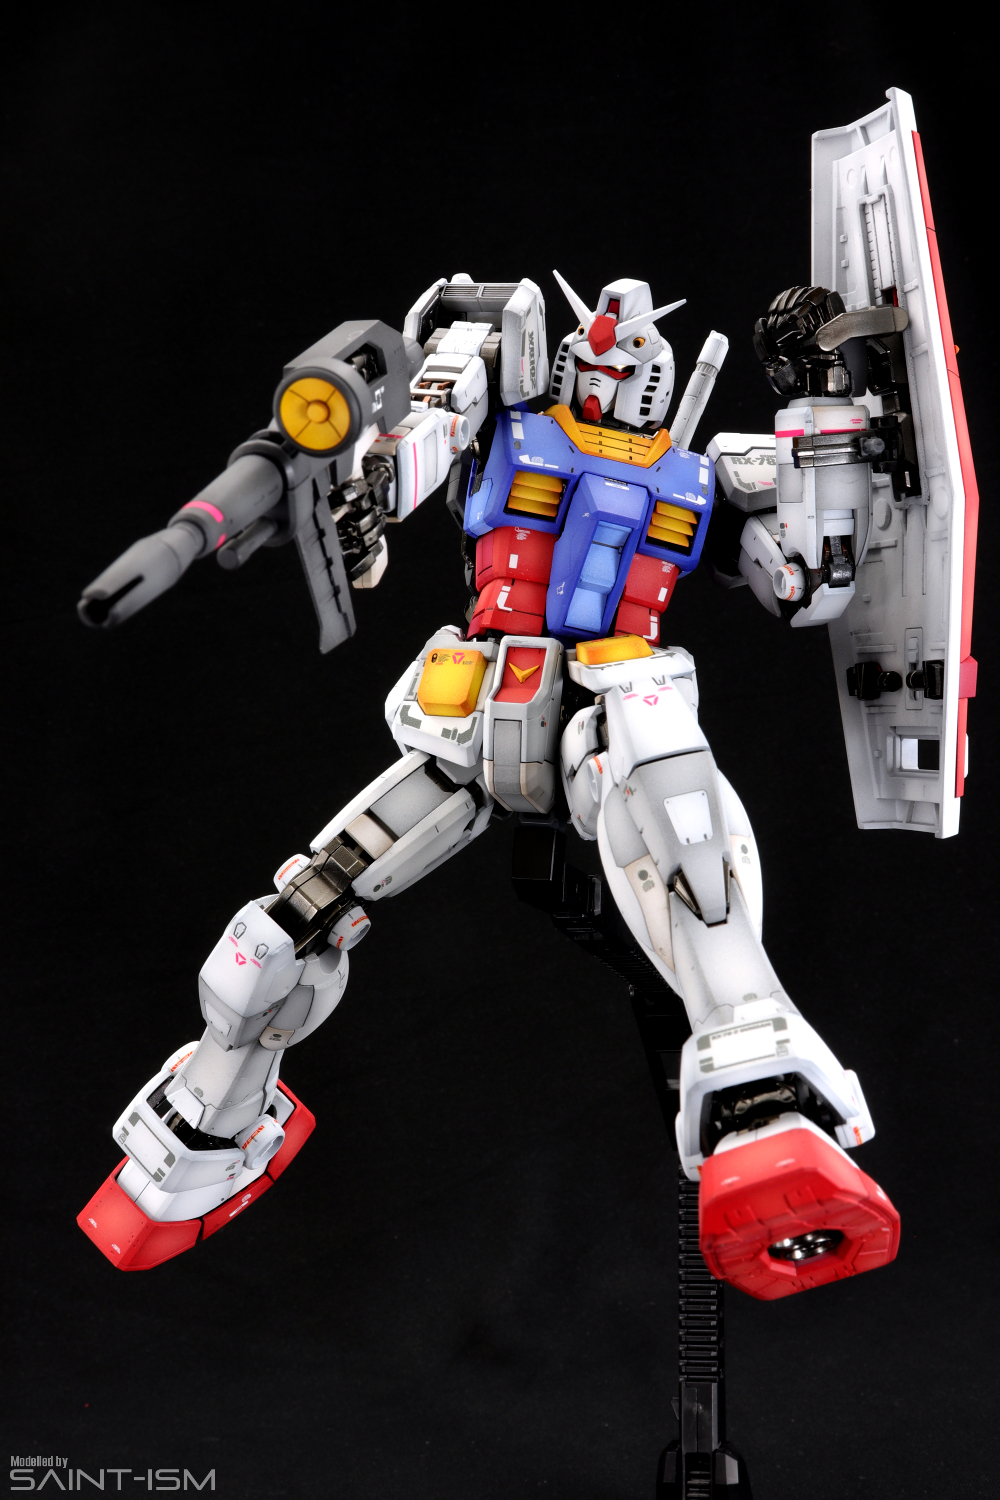
Also let’s talk about the hands, or “emotion manipulators” which Bandai calls them. They are pretty much the only blemish on what I’d consider a perfect rendition of this design. If pure rage is the emotion they wish to convey they have succeeded with flying colours. They are just horrible and remind me why I prefer fixed hands any day. They are oversized, fiddly and any attempt to make a closed fist results in the fingers popping off. The ball joint in the wrist also tends to weaken over time, causing the hand to sag when holding the rifle. I’m definitely not looking forward to dealing with them again, especially on the Nu, Sazabi and Jesta when I eventually get to those kits.
Unlike most other kits, they don’t provide foil stickers for the eyes. I ended up using some spare gold foils from the RG Gundam and then plastering the black sticker over it. I think it turned out quite well.
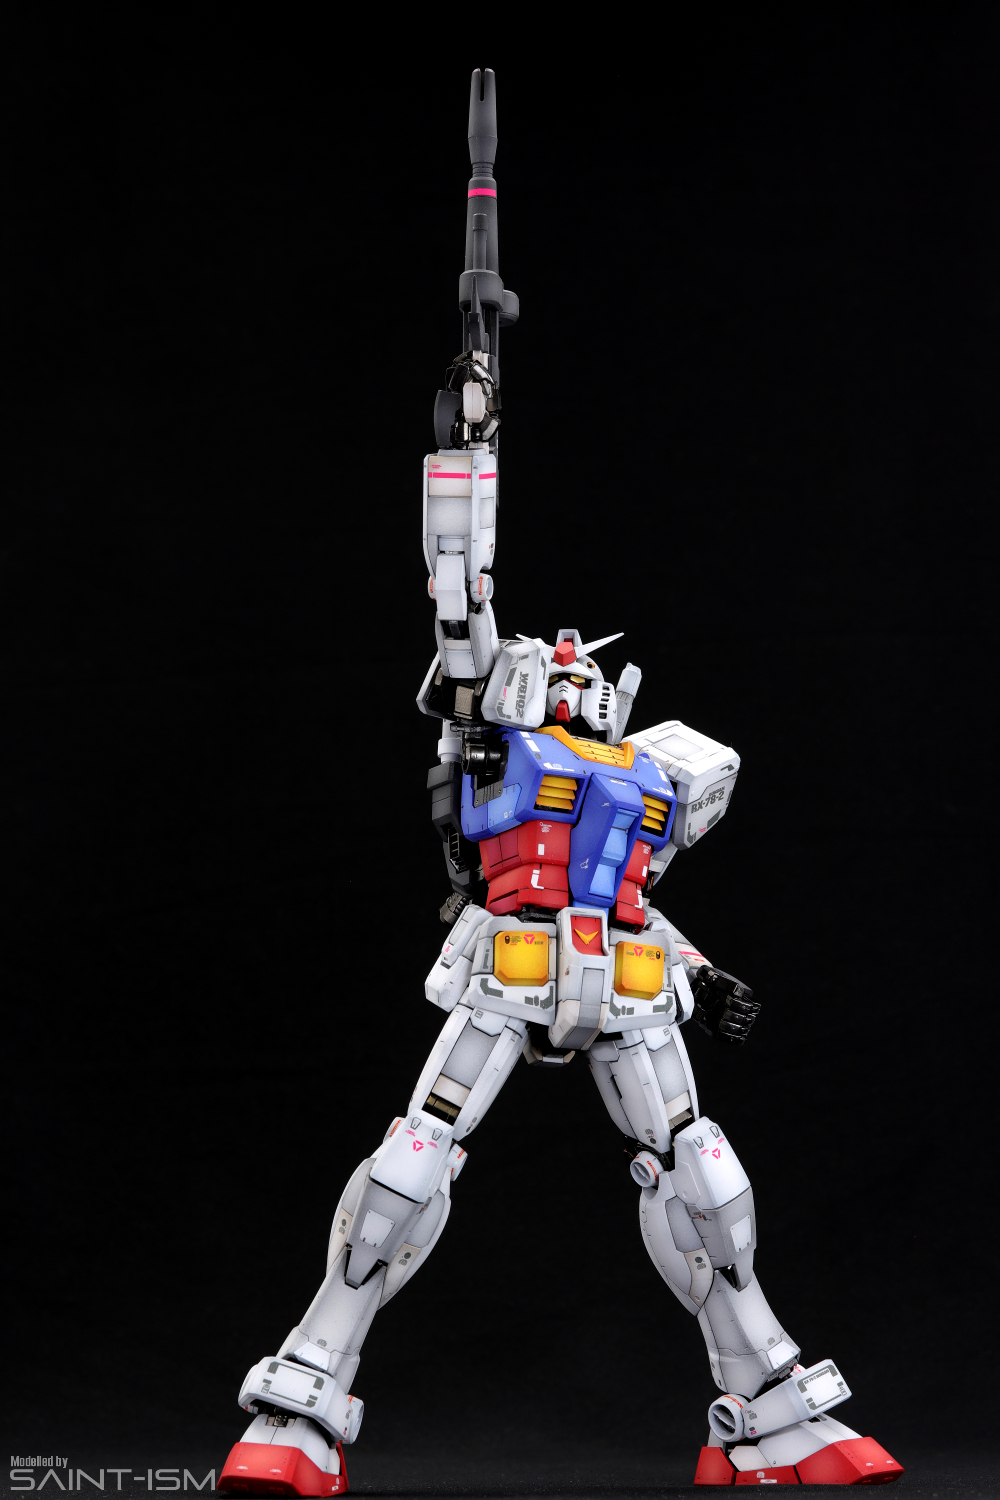
For this kit I also experimented going back to my 15-55mm wide angle lens to shoot action poses. For over a year I’d been using a 60mm macro lens for all my photoshoots, and while the 60mm was really good for static shots, I discovered that when I was copying some of Lightning Ace’s poses, they just weren’t quite as punchy. The wide angle lens is absolutely essential when going for those Obari-eque poses as it tends to exaggerate the size of items closer to the lens. I’ll probably do another photography article going over this at a later date.
Painting

White – Blue FS (100%) base coat, followed by Mr Color GX Cool White (100%)
Light grey – Neutral Grey (100%) base coat, followed by Neutral Grey (50%) + White (50%). Mr Color GX White is used for a very small final highlight
Light brown – Mr Color GX White (90%) + Propeller color (5%) + Light Brown (5%) base coat. White is added for highlights.
Blue – MS Blue + bit of Cobalt Blue + bit of Fluro Pink
Red – MS Red (100%) base coat. White and yellow added for highlights
Internals – Black base coat followed by SMS Stainless Steel (light coat)
Internal Copper – SMS Copper
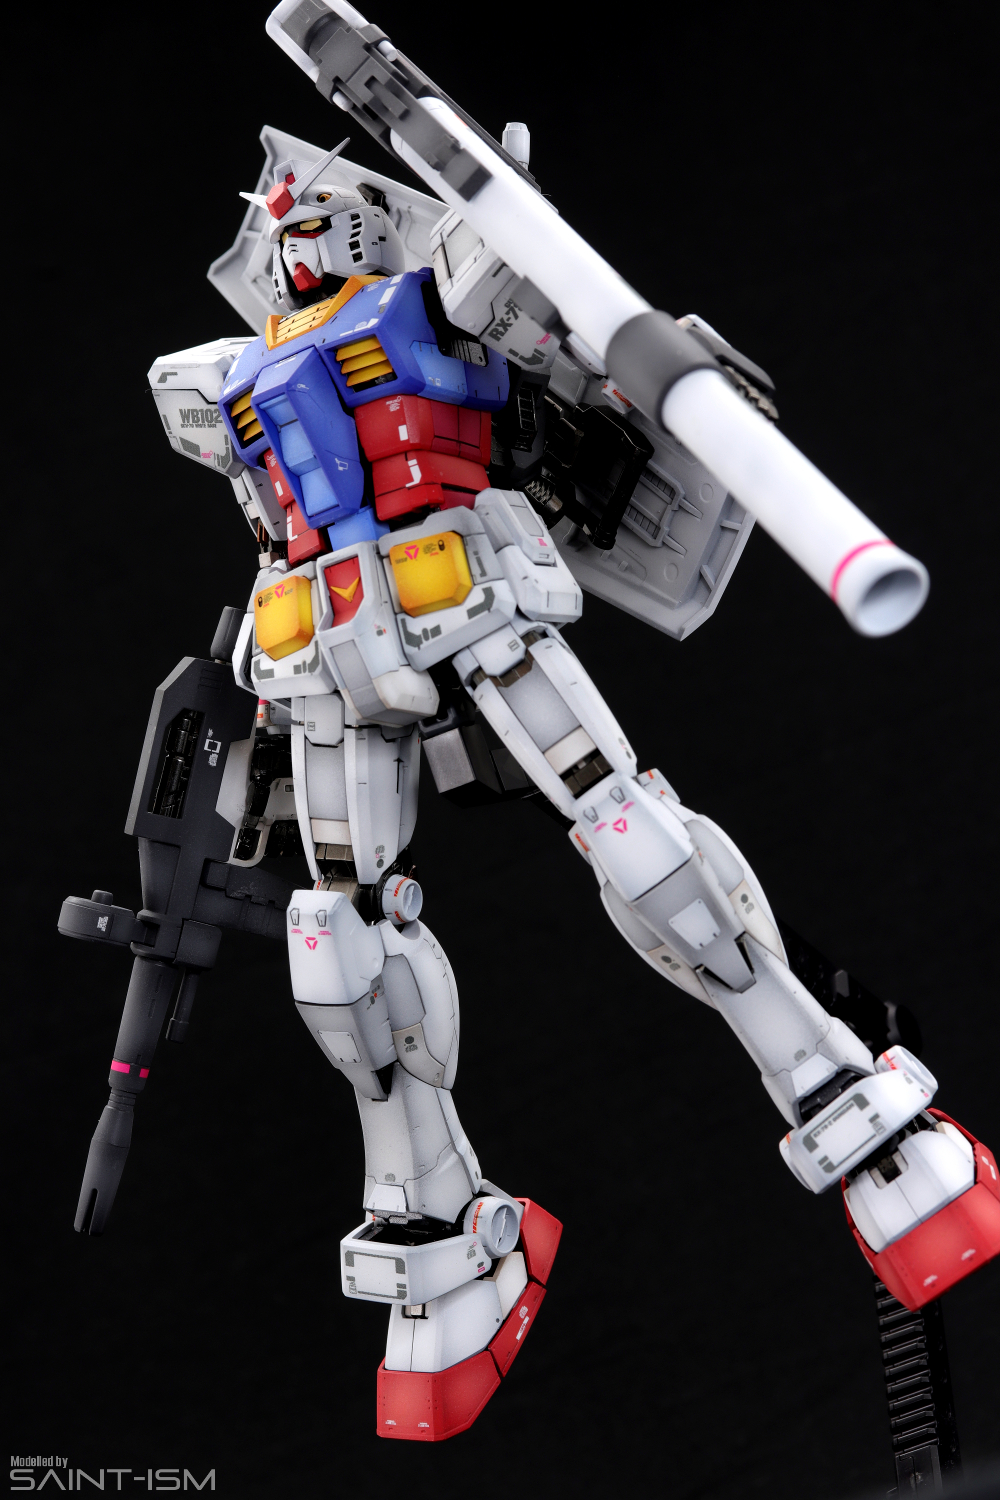
Beam Rifle grey – Neutral Grey (70%) + Black (30%) base coat, followed by Neutral Grey (80%) + Black (20%) for highlights
Yellow – Orange (100%) base coat, followed by starter white. Orange Yellow (80%) + Yellow (20%) misted over, then white is added for highlights
Gallery


With weapons


Action Pose


