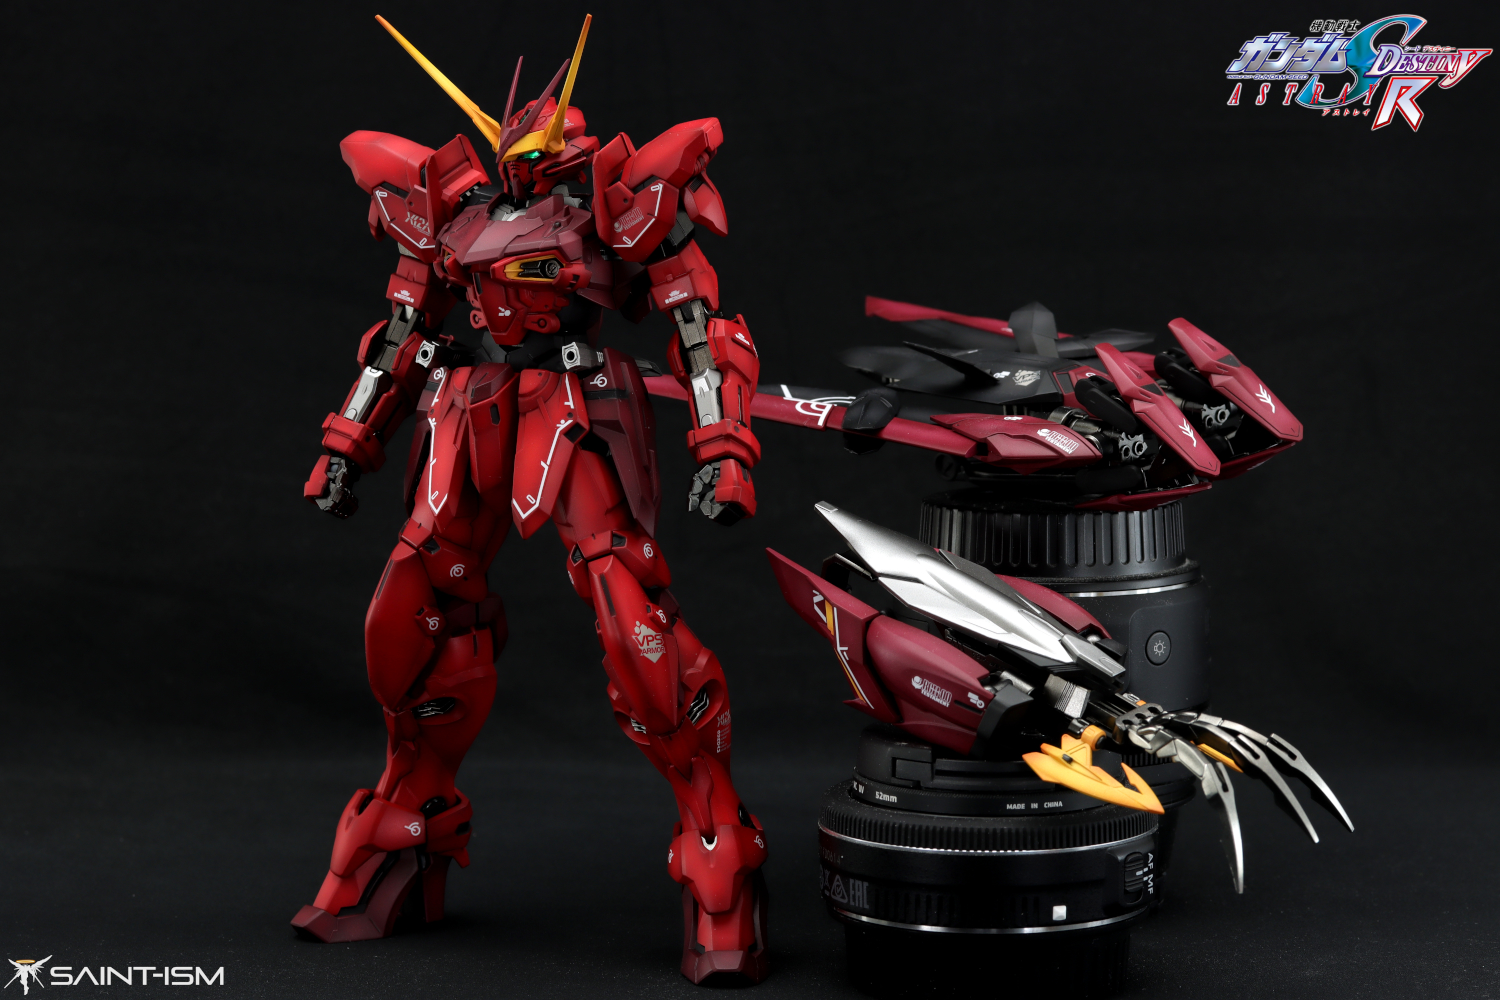
The curse of painting red continues! Every red kit that I paint I will usually strip and repaint at least once, or have to go back and make colour corrections, leaving a process that’s much more complicated that it has to be. Even after the rather long process documented in my WIP posts, I stripped the dark red parts and still had to fiddle around with the armour red.
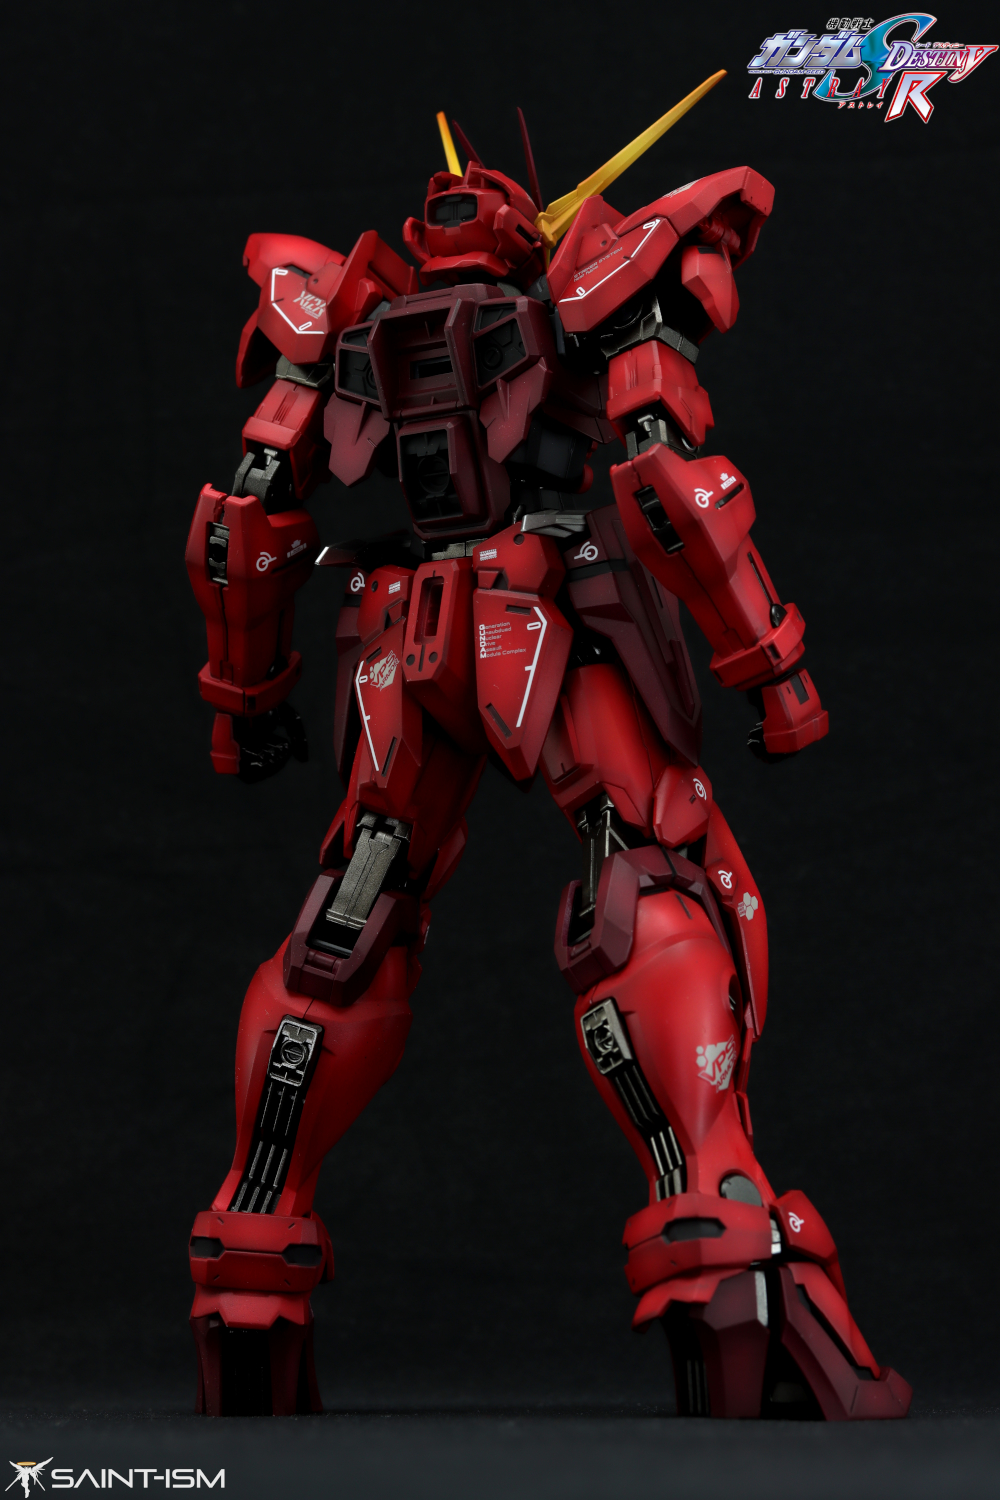
Anyway my thoughts on this kit after building it; it’s a pretty neat design. It reuses some of the GAT-X frame, but these parts are cast in PS instead of ABS. There are some corners cut, especially on the Trikeros with some nasty hollow spaces. Instead of sealing them I opted to just paint them in a grey so they would be a bit less noticeable. The “back” of the MS is also a bit of a disappointment with it just being one piece, so you’re going to have to detail all those parts yourself.
In terms of seamlines, there are some on the backpack connector and on the pistols, I left these as is.
Also I fulfilled my broken/lost parts quota on this kit, I carelessly broke one of the internals of the feet, and only thanks to The Hangar Bay was I able to complete this kit in a timely manner. So please check them out if you’re after P-Bandai kits as soon as they’re released in Japan, you can use my coupon SAINTISM06 to save 6% on your order.
Anyway as usual, photos to come at some undisclosed point in the future, however I might bust this one out sooner rather than later.
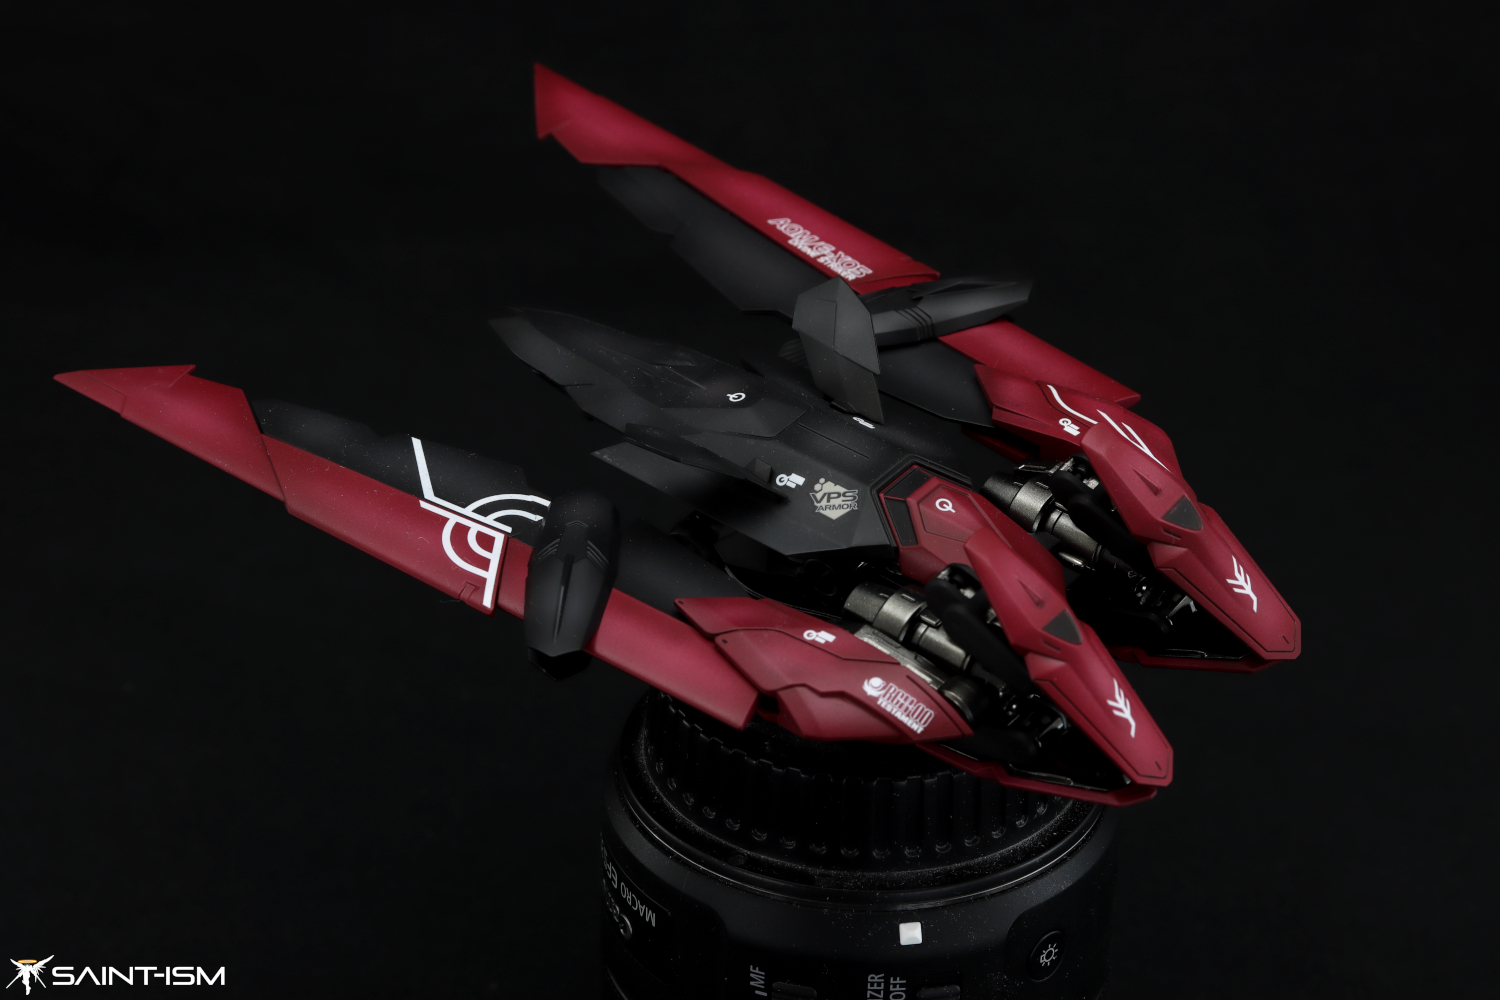
Painting
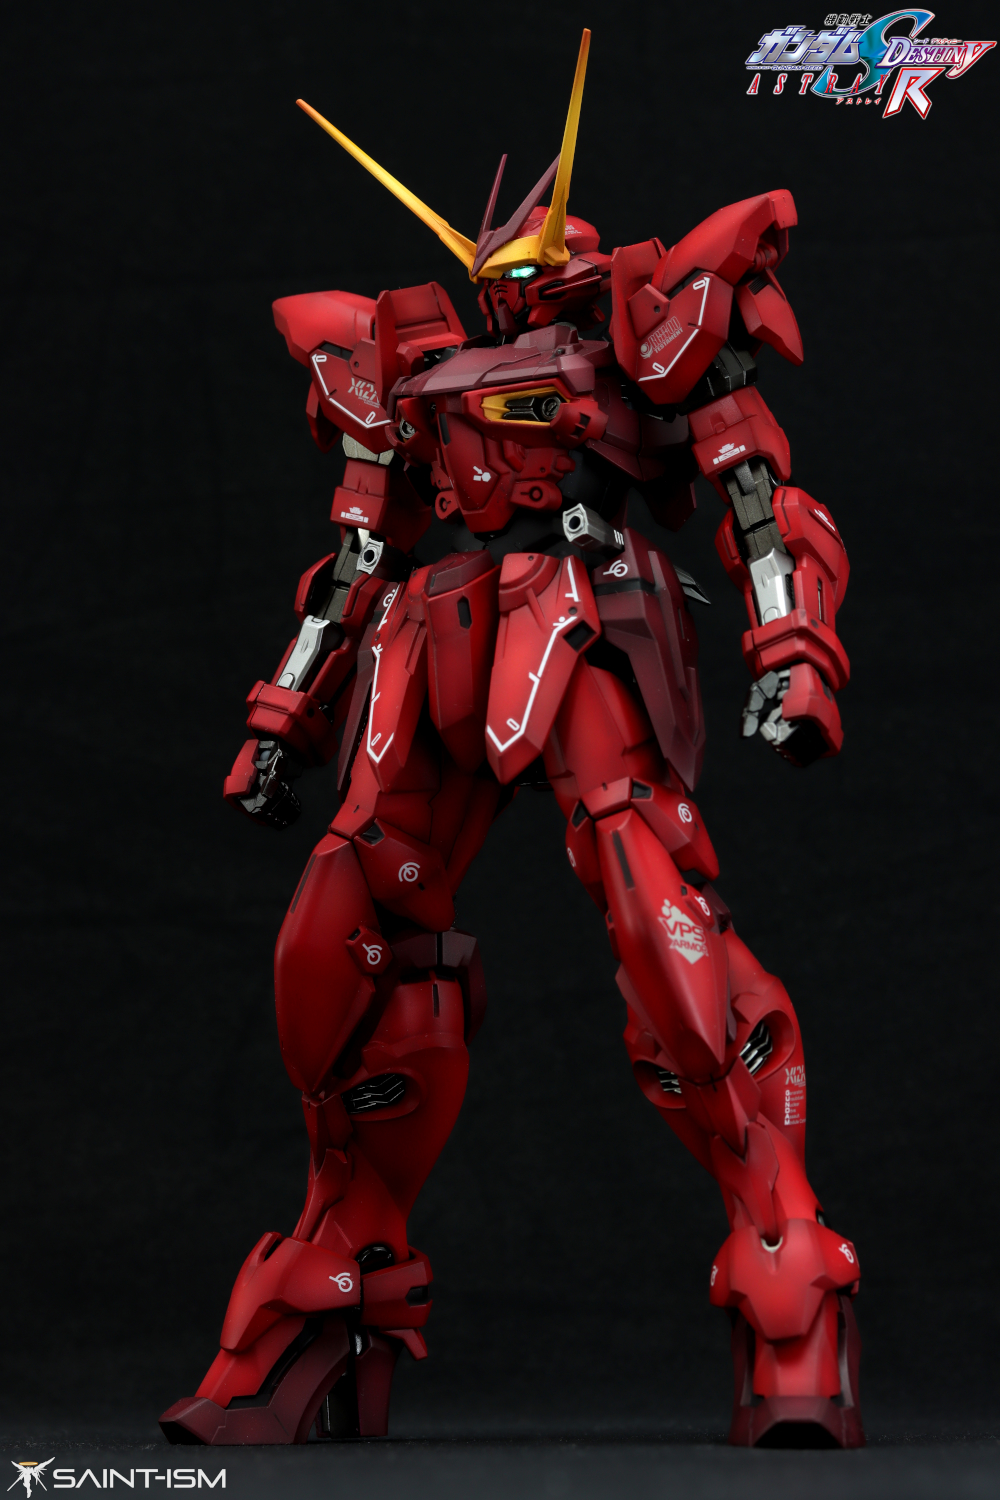
Red – White primer, followed by Hull Red preshade, then coat of Mr Color GX Harmann Red. Bit of yellow and white added for highlight, then Mr Color GX Clear Deep Red postshaded on edges. Finally, a light coat of Mr Color Clear Red to bring some life back into the red.
Dark Red 1 (MS feet, chest, skirts) – Mr Color Wine Red + bit of black + Russet + bit of Hull Red for the base coat. It’s hard for me to remember the exact mix because I had to wing it after deciding to repaint the parts. For the highlight, I used Russet + bit of black + bit of white.
Dark Red 2 (Trikeros, backpack) – Mr Color Wine Red + bit of blue + Russet. Yellow + white added for the highlight, then the original colour used to postshade / blend. Finally I hit it with some Mr Color GX Clear Deep Red postshade just to darken it a bit.
Black (backpack, waist) – Mr Color GX Ueno Black base coat. White + bit of Hull Red added for highlights. I find these days adding a bit of red to the black highlights stop the black from looking bluish.
Yellow – Mr Color Orange base coat, starter white technique, light coat of Mr Color Orange Yellow (90%) + Yellow (10%). White and yellow added for highlights
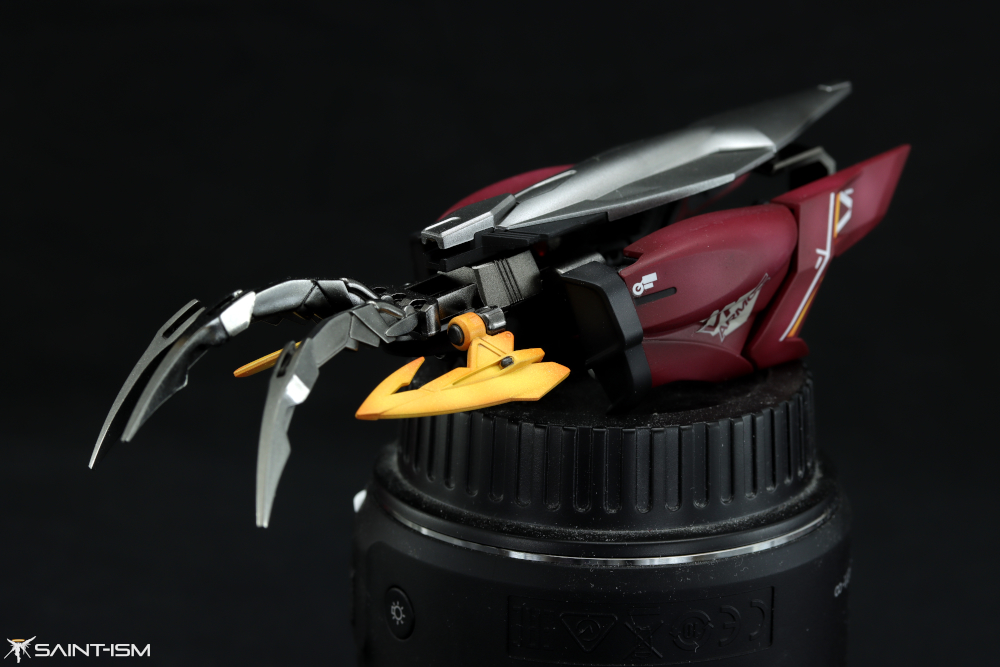
Trikeros claws – Gaianotes EX Black base coat, followed by SMS Stainless steel
Trikeros silver – Gaianotes EX Black base coat, followed by Mr Color Super Metallic 2 Iron
Internal Frame 1 – Gaianotes Starbright Iron + EX Black
Internal Frame 2 (elbows, knees) – Gainotes Starbright Duralumin
Handguns – Gaianotes EX Black base coat, followed by Mr Color Super Metallic 2 Iron
Why is red so hard to paint?
Red’s covering power is not very good, it’s not fully opaque and the base coat can affect the final colour. Furthermore, red is one of the only colour in which the light and dark can appear as other colours (pink and brown respectively). We cannot simply add too much white or black into the red otherwise the overall colour may not appear to be a true “red” at the end.
Furthermore, the highlight colour can also change the overall appearance of the red. In this case, when I tried orange as a highlight for this Testament Gundam, the overall tone of the kit started to look more like an orangey red which I was not after. This is what made me do a coat of clear red, to somewhat restore the original deep red colour.
What’s the difference between dark red and brown?
Dark Red will look red as you paint it until it reaches max opacity. Brown will look brown as you paint it.