I have quite the history with the Wing Zero Custom. I built the original MG way back in 2009, when I was still learning how to paint. In that build while trying to fix the seamline on the wings I tried to mod the backpack connector for the rear wings with a C-cut, however I kinda messed up and the connection became quite floppy. Also one of the Twin Buster Rifles came warped, as a result I never got to pose that build so I don’t really have a good memory of this design / MS.
Fast forward to 2020, and we are finally getting an announcement for a new MG ver.Ka. After much hype and excitement what does it turn out to be? The Wing Zero :(. I’m not going to lie, I was kinda disappointed. However some time later, I came across this particular design:
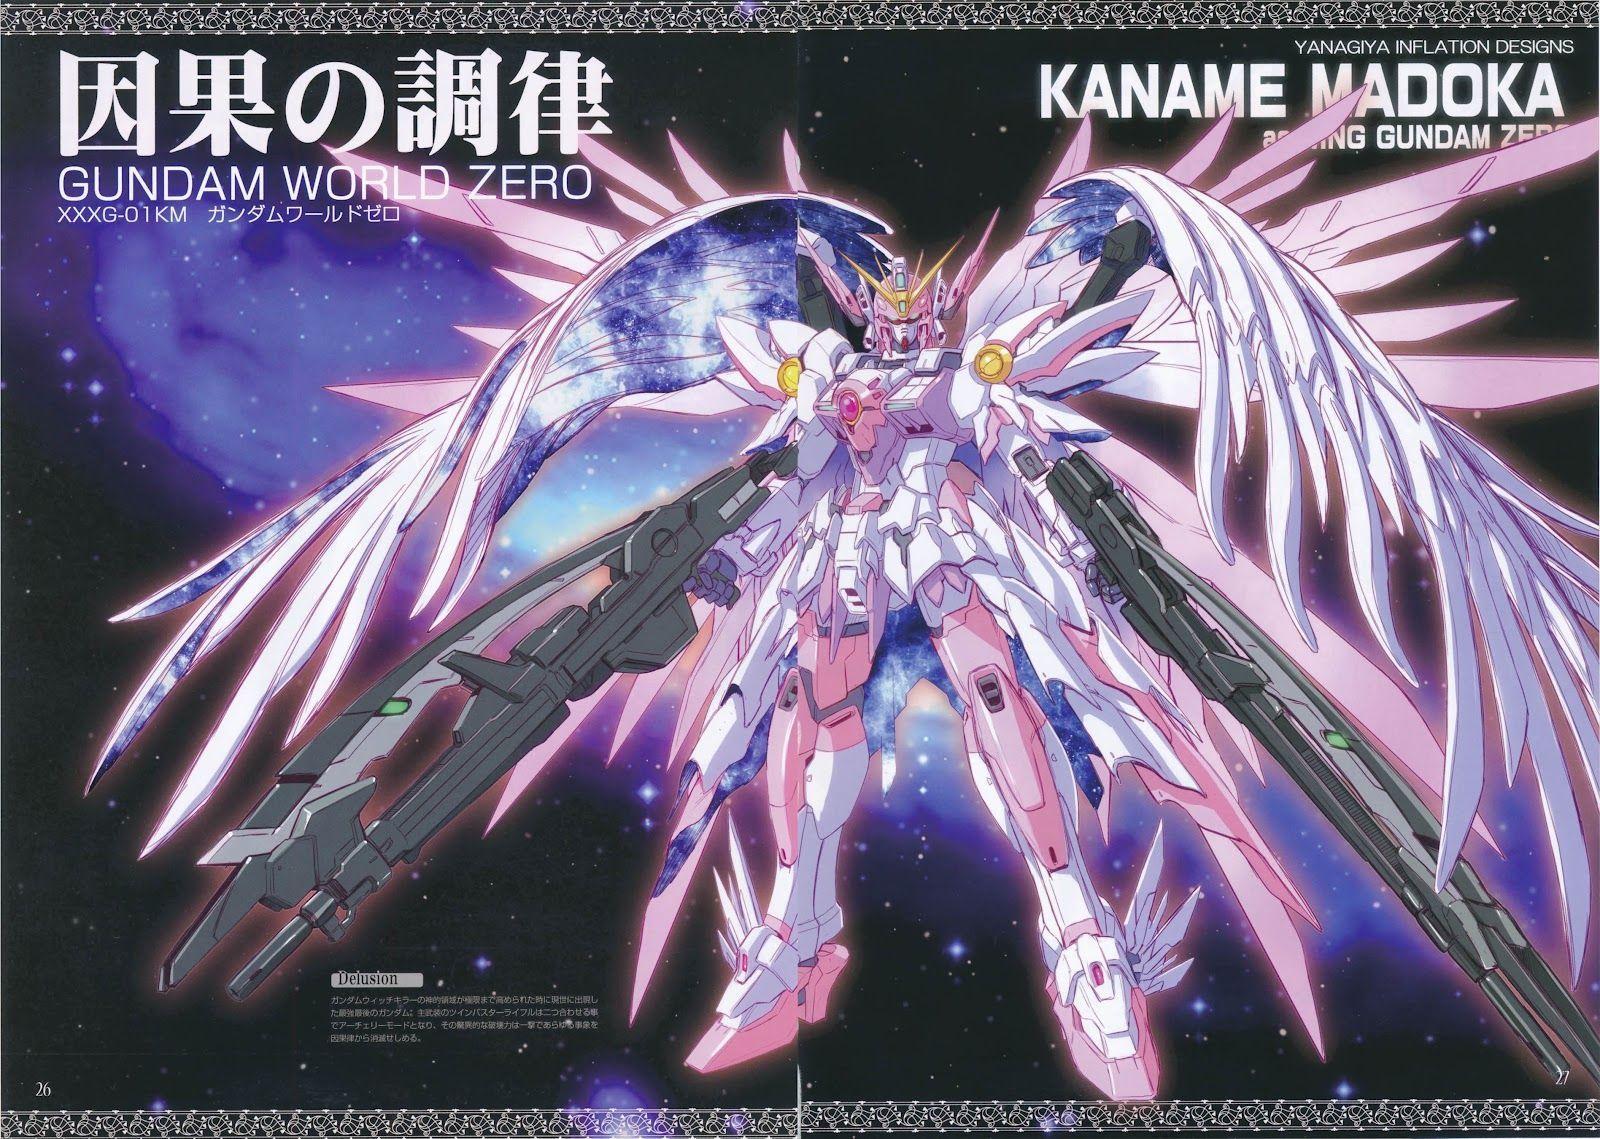
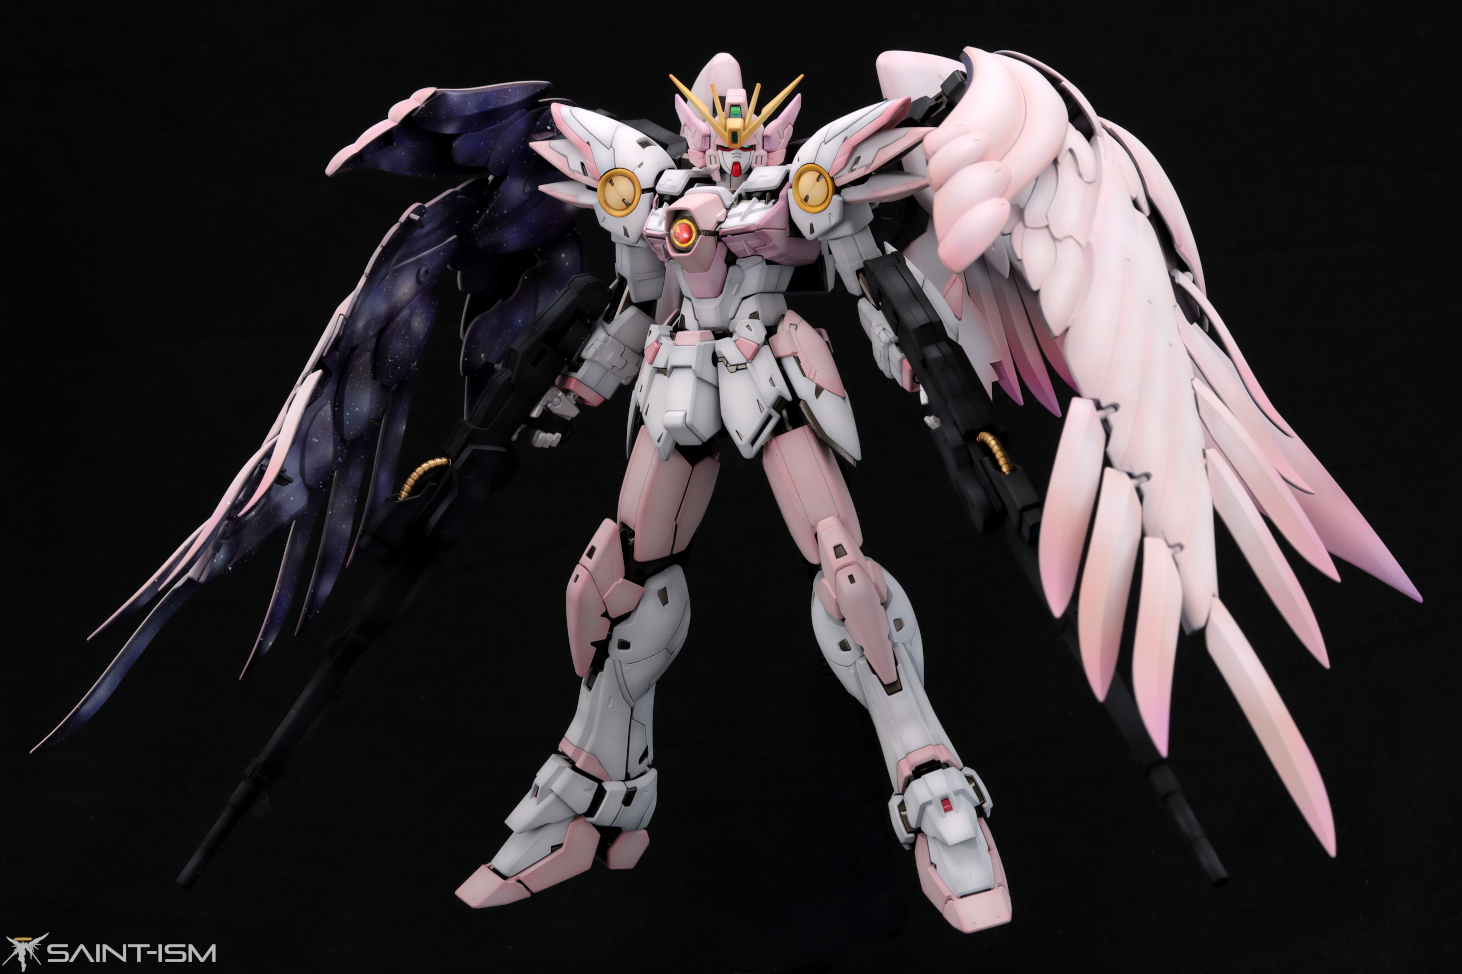
When I saw this, I really wanted to do this colour scheme since I felt it was really fitting for the WZC. The angel wing design was always a bit too over-the-top for me and I felt it’s more of a Super Robot design. The Madoka Magica colour scheme just works with it. Also out of spite, because we didn’t get an MG G-Self dammit! Anyway after pre-planning the colours I started to have my doubts it whether this scheme would work, and I’d like to thank Luperpla and Tex Merquise for kinda pushing me to do this.
I'm not sure I can make this scheme work…part of the ultimate colour scheme is the purple/blue void in the skirt and the stock WZ just doesn't have the silhouette to fit it in. I could paint the back of the wings but I don't want a giant black blob when it opens up. pic.twitter.com/m0GiHtMeiW
— YJ (@TheSaintISM) January 8, 2021

Painting
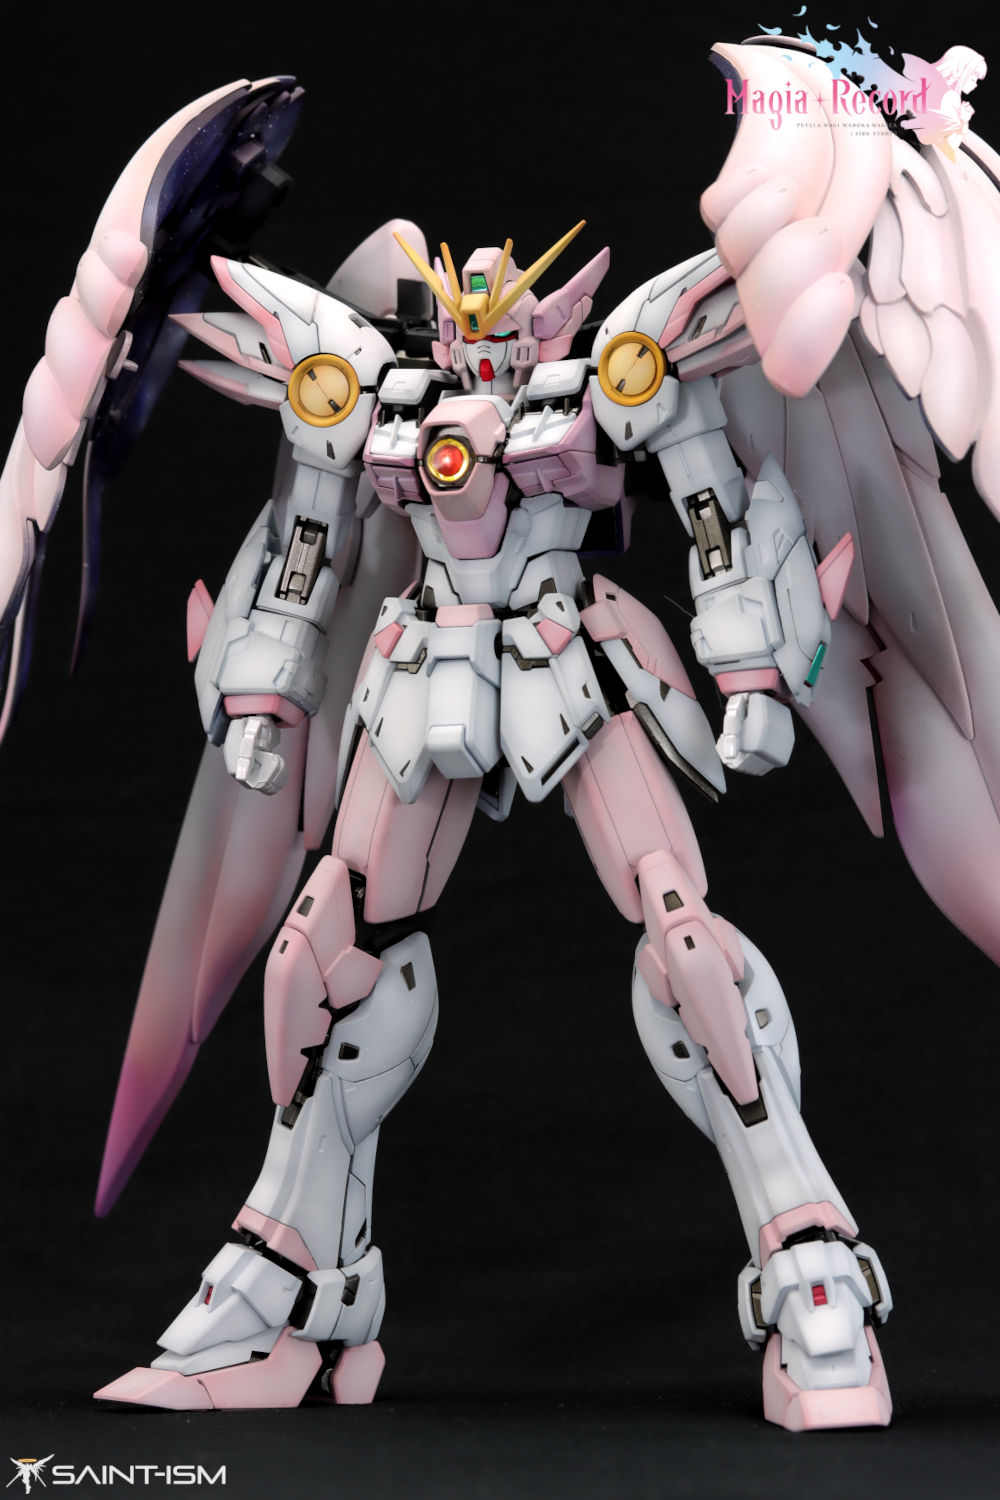
In painting this kit I learned more than I ever cared to know about pinks. For example a pink that’s biased towards yellow is known as a “peachy pink”, pink which learns towards purple is “lavender” and then you get pink which is biased towards red. The cool thing is that all of these pinks just naturally work together. I had never painted this colour before so I was pretty anxious about it actually working in real life, so I decided to fade everything up for a pastel-type look in hopes that it would blend in a bit better.
Anyway here are some reference images which I also used to help with colours.


I still haven’t quite decided if I want the piece on the Zero system to be red or just clear, but there’s still some time for me to adjust it later. For this build I really wanted to hit that pastel-like look, so my highlight layer was pretty much white with some drops of the base colour.
White – Mr Color 306 Grey FS base coat, followed by Gaianotes Pure White for shading / highlight
Light Pink – White primer, Gaianotes Cyber Formula Pink CM-10 (70%) + Pure White (30%) Base coat. Pure White (95%) + Gaianotes Cyber Formula Pink (5%) used as highlight. Finally some Gaianotes Flesh pink very lightly misted over the highlight
Lavender Pink – White primer, Gaianotes Cyber Formula Lilac Pink (70%) + Pure White (25%) + Purple (5%) base coat. A few drop of base coat colour added to pure white and used for highlight
Yellow – Orange base coat, starter white technique, Orange Yellow misted over, then Orange Yellow + White for highlight
Chin Red – Gaianotes CM-06 Crimson Red
Internals – Gaianotes Gunmetal, Gaianotes Duralumin for the elbow joints
Hands – Mr Color Crystal Color Moon White
Wings front – Pre-shade with Gaianotes CM-10 Pink on edges, followed by Pure White for highlight.
Also finally, I did minimal panel lining and details since I wanted to keep it as clean as possible, and for once I decided to omit decals because it’s a Super Robot dammit!


Galaxy Wings
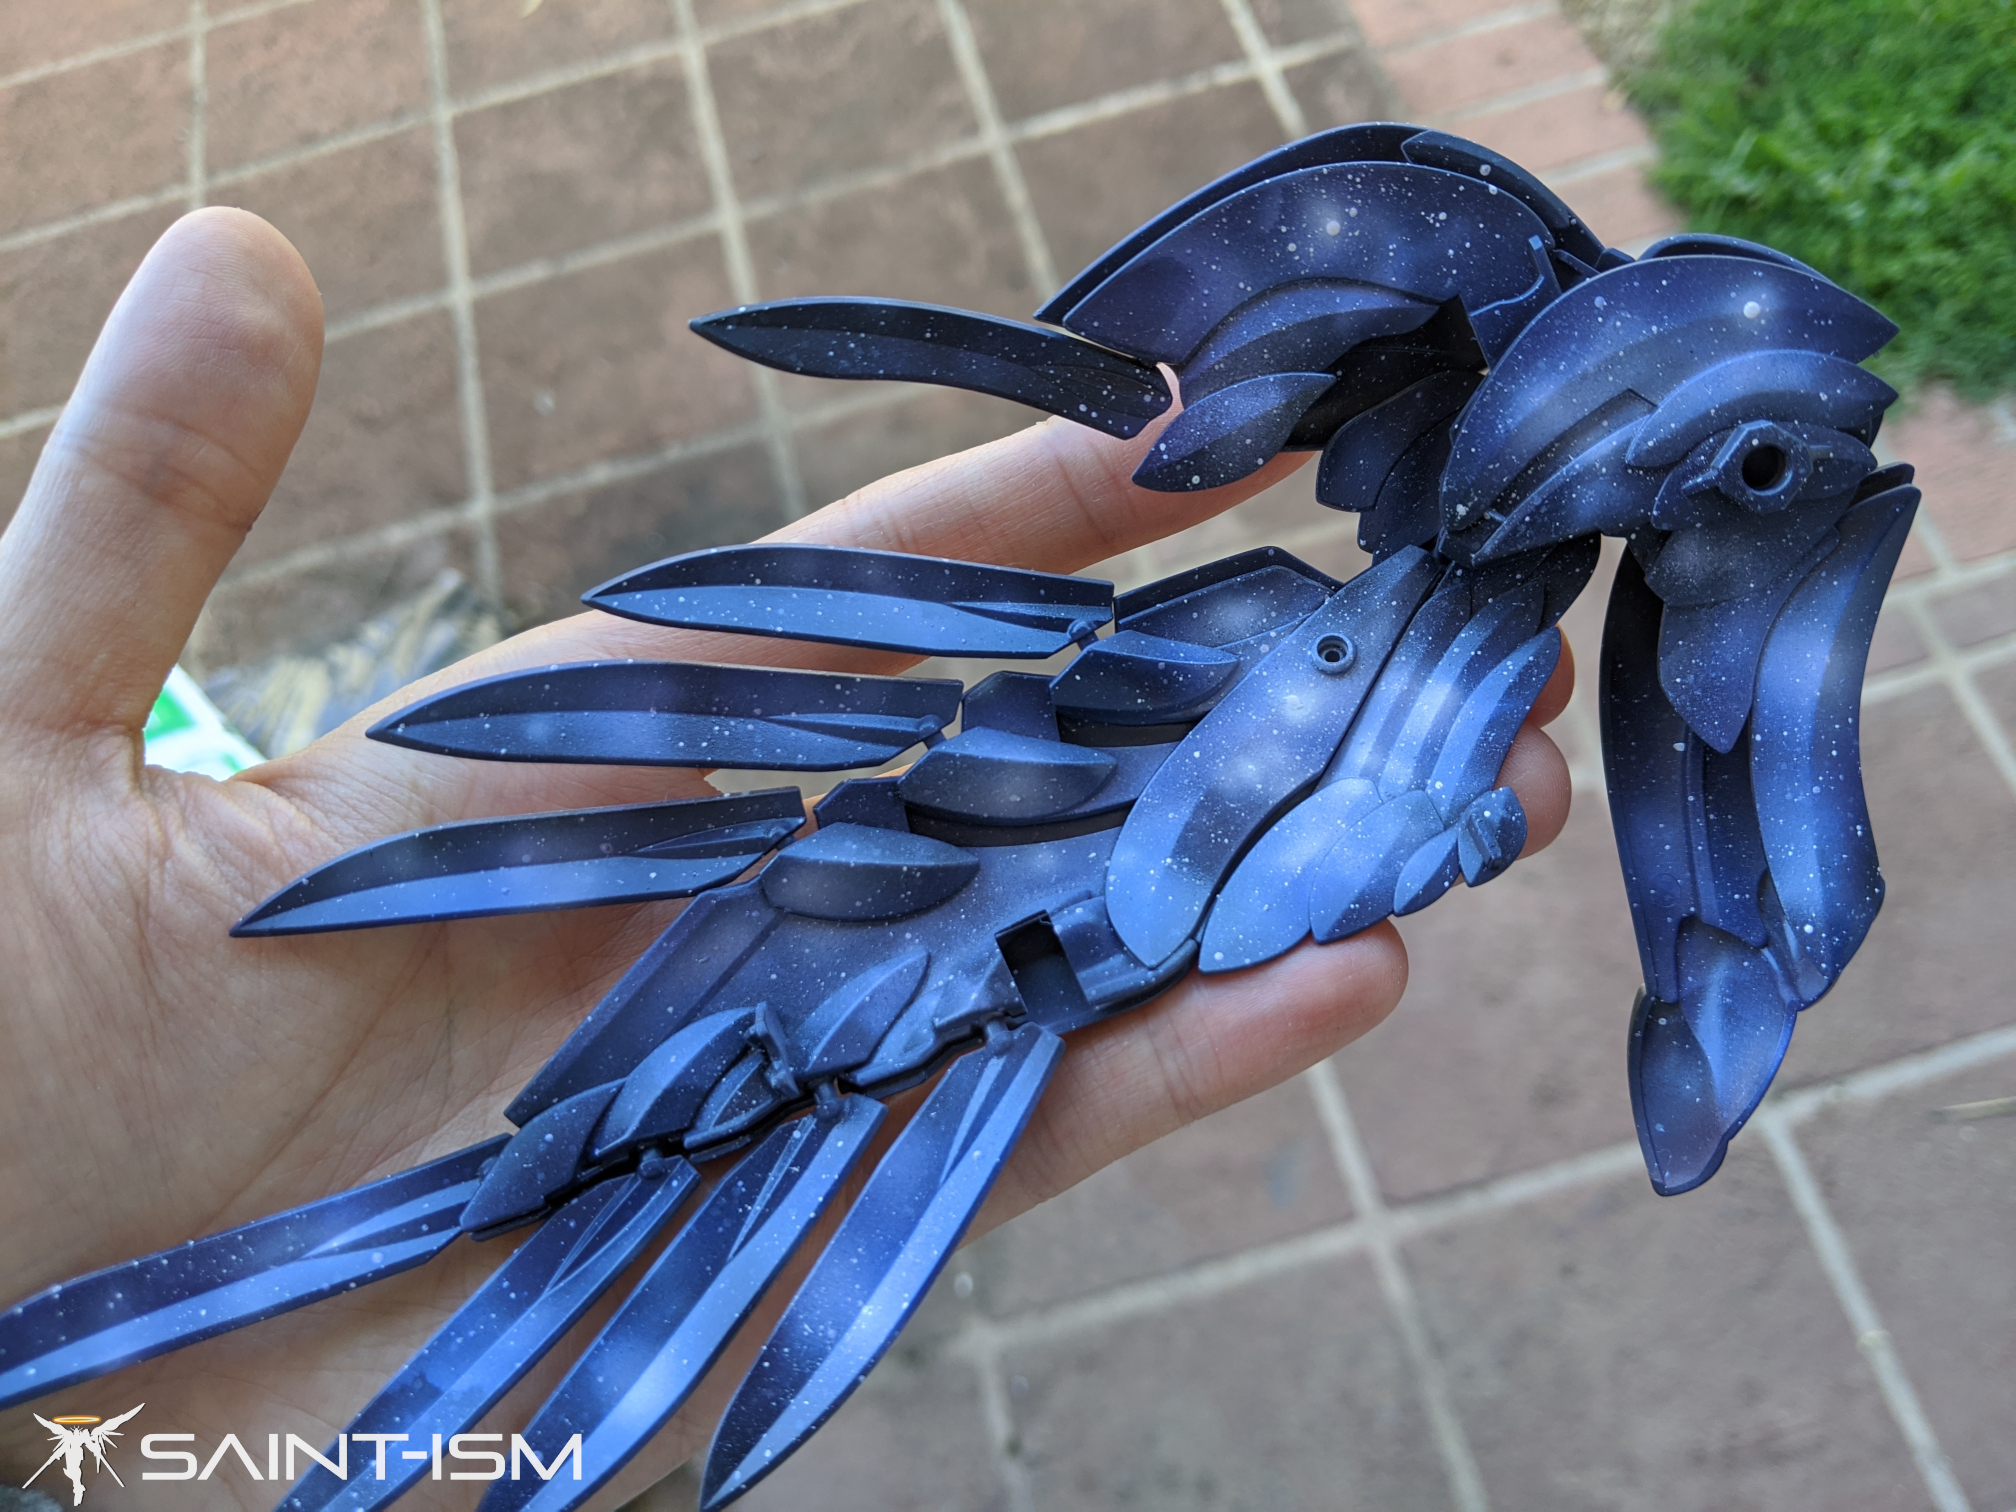
One of the main features of this colour scheme is the “Galaxy Wings” on the insides of the wings. Prior to doing this I was honestly quite anxious about being able to achieve this effect, but after watching some videos and trying it for myself it actually is not too difficult. The hardest part was actually deciding when to stop and be happy with the final result.
In short here are the steps I did to get this effect:
- A base coat, you can use black or a dark blue/reddish purple
- Use white to kind of map out some lighter areas. You can use stencils to help create some randomness, I just used the edges of some masking tape which I roughly teared up
- Use a purple to blend in/around the white parts, then again with a blue
- Create some random stars – the easiest way to do this I found was to dip a wide brush in some unthinned white paint, and randomly flick it at the surface. The further away you are, the smaller the stars will be
- Take some clear white or white, and lightly spray a “flare” or corona around where the stars are more dense
- To create a very bright star, take a toothpick dipped in white paint, and put a single dot onto the surface
Here are the videos I studied:
Amazing tutorial amd build, thanks for sharing this !
Do you do commissions? jeeeesh