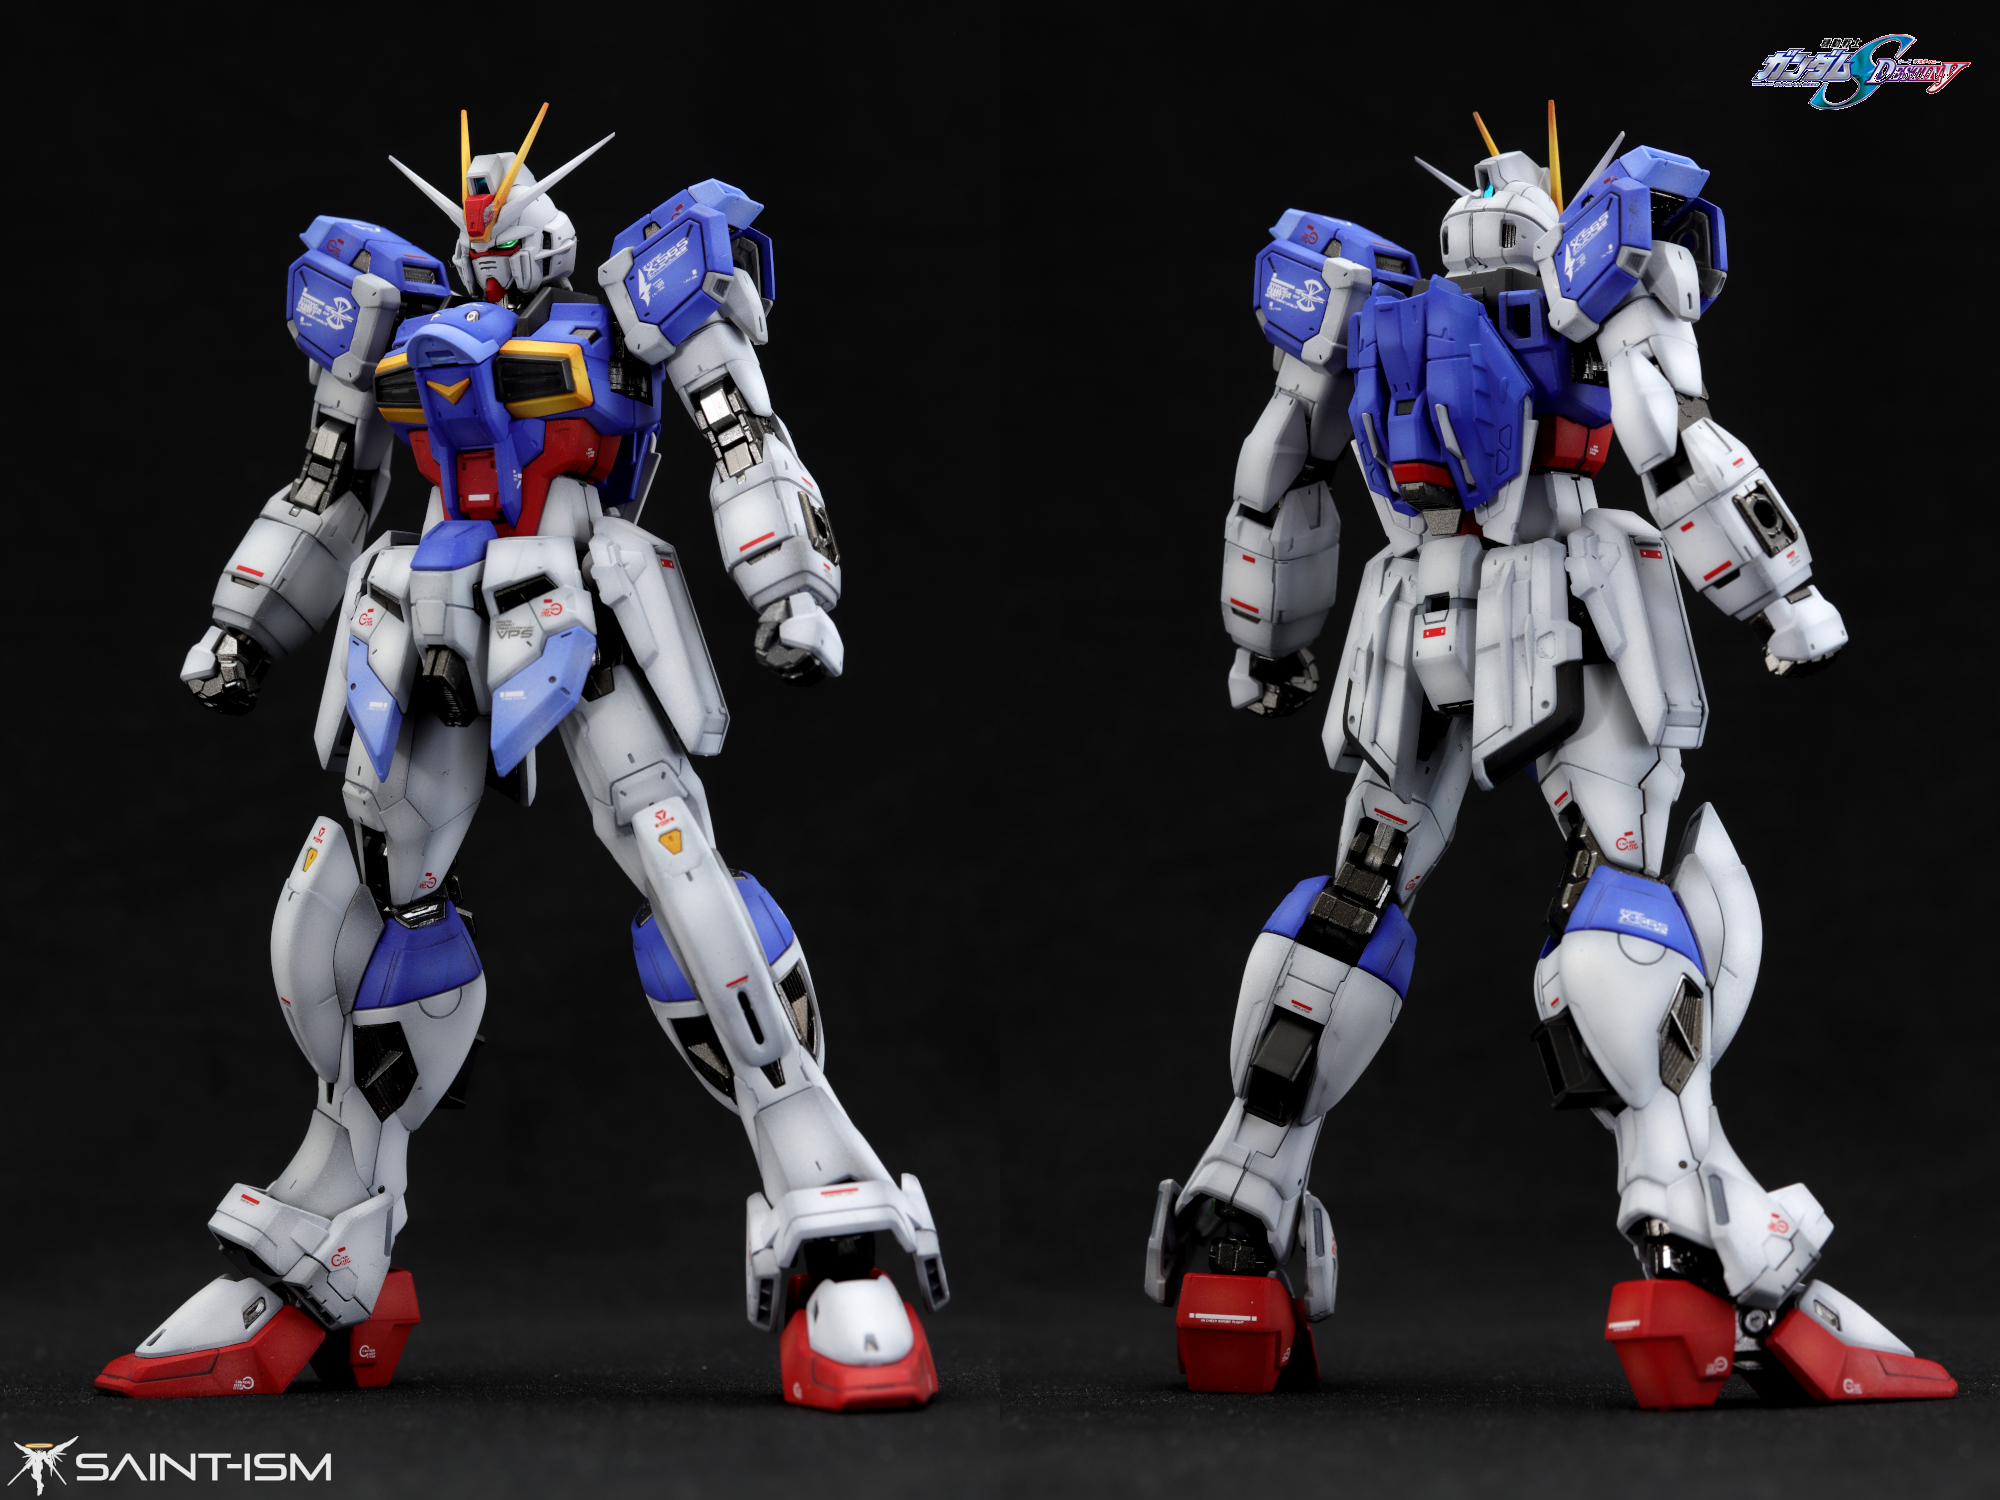
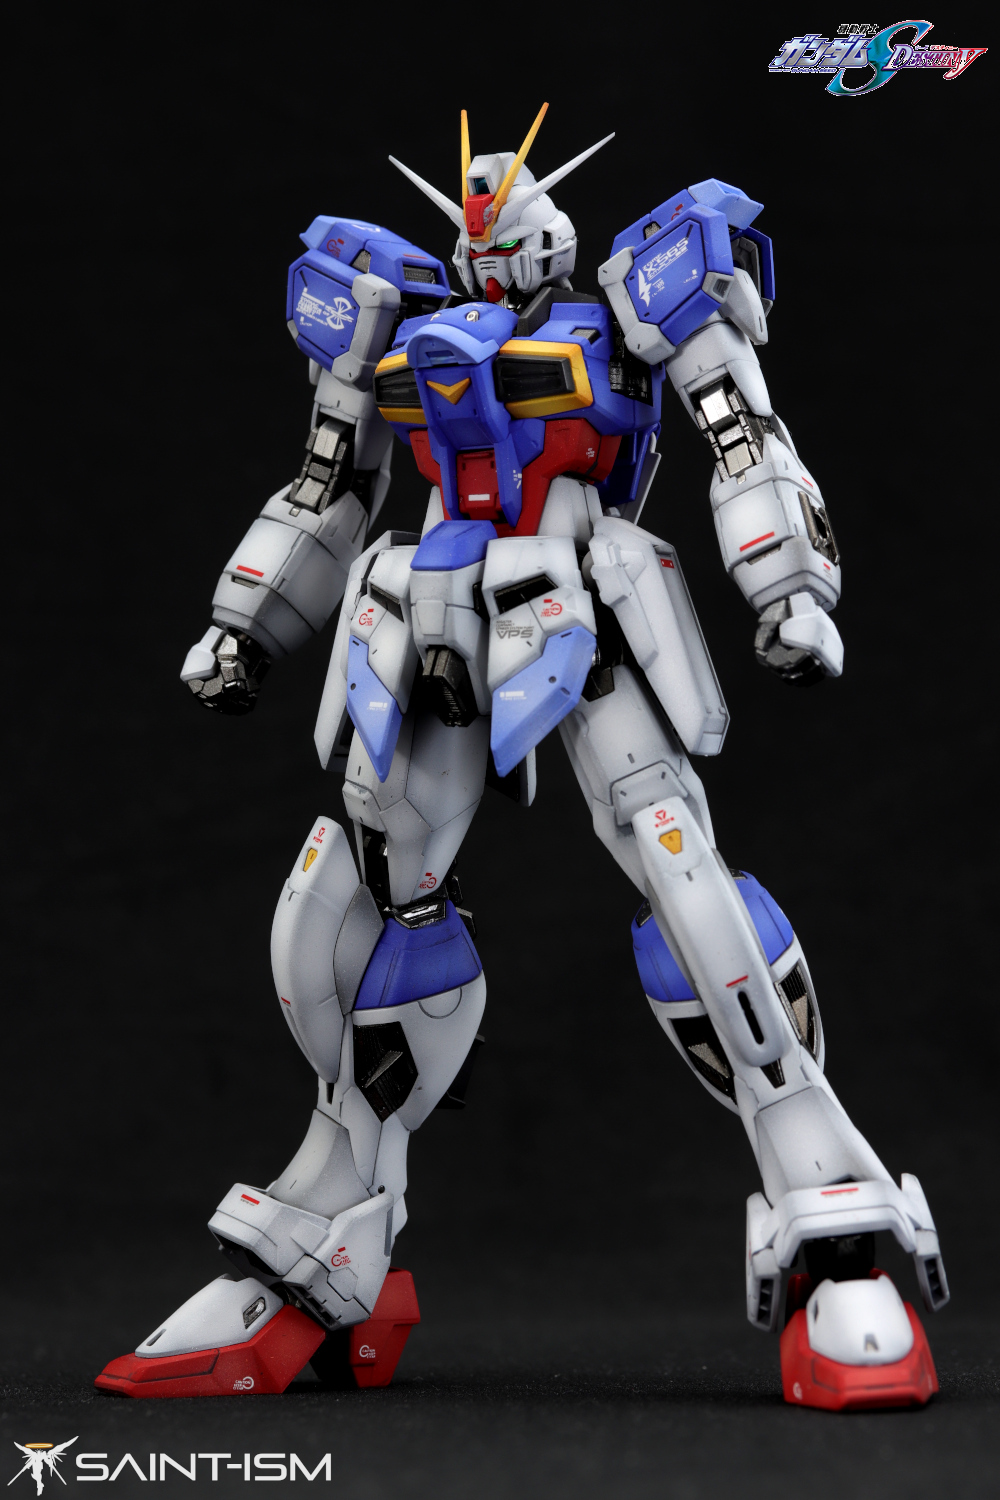
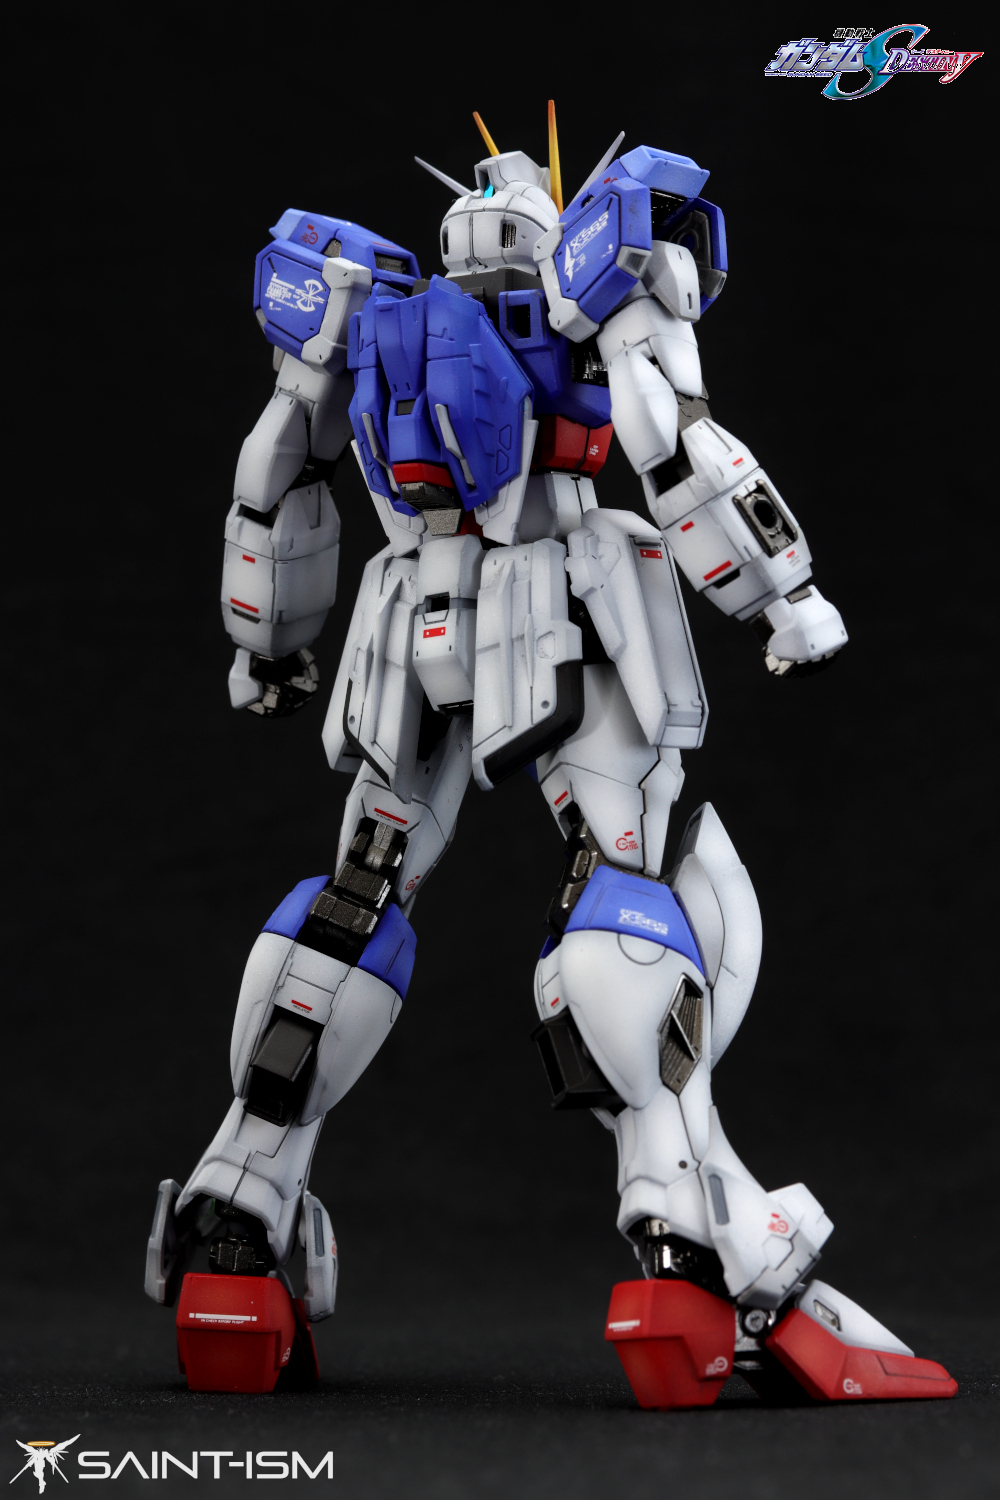
There’s really not much I can say for this kit except that it really is one of the best RG I’ve built and the definitive rendition of the Impulse Gundam. This was built at the same time as the HG GTO, and much like everything I touched at the time, I ended up botching something. In this case, I lost the barrel for the beam rifle and I won’t have any replacement until the RG Sword Impulse ships in November.
I have to say though, I really loved how the blue turned out and it really shines in the photos.
Painting
White – Mr Color 306 Grey FS (100%) base coat, followed by Mr Color GX Cool White (100%)
Light Grey – Mr Color Neutral Grey base coat, followed by Cool White (95%) + Neutral Grey (5%) for highlight
Blue – Mr Color AEUG MS Blue + bit of Cobalt Blue + Purple. White added for highlights
Light blue – Same as blue but more white added.
Red – Mr Color Shine Red (70%) + Red Madder (30%). Yellow and white added for highlights
Black – Mr Color GX Ueno Black base coat. White added for highlights, then Black (100%) used to post-shade/blend
Yellow – Orange (100%) base coat, followed by starter white. Orange Yellow (80%) + Yellow (20%) misted over, then white is added for highlights
Internals – Gaianotes Starbright Iron + Black
Beam Rifle/backpack grey – Gaianotes Neutral Grey V, followed by Neutral Grey IV for shading
The RG part is really small. How on earth u able to shade it with airbrush so precise and get the result like that !?
Most colours aren’t 100% opaque, and the highlighting technique takes advantage of this. The gradient build up is very gradual and as long as you are able to spray an initial dot or fine line where the highlight should be you don’t have to be that precise.
Also, thinning the paint to the PSI you are working at is pretty key.