![]()
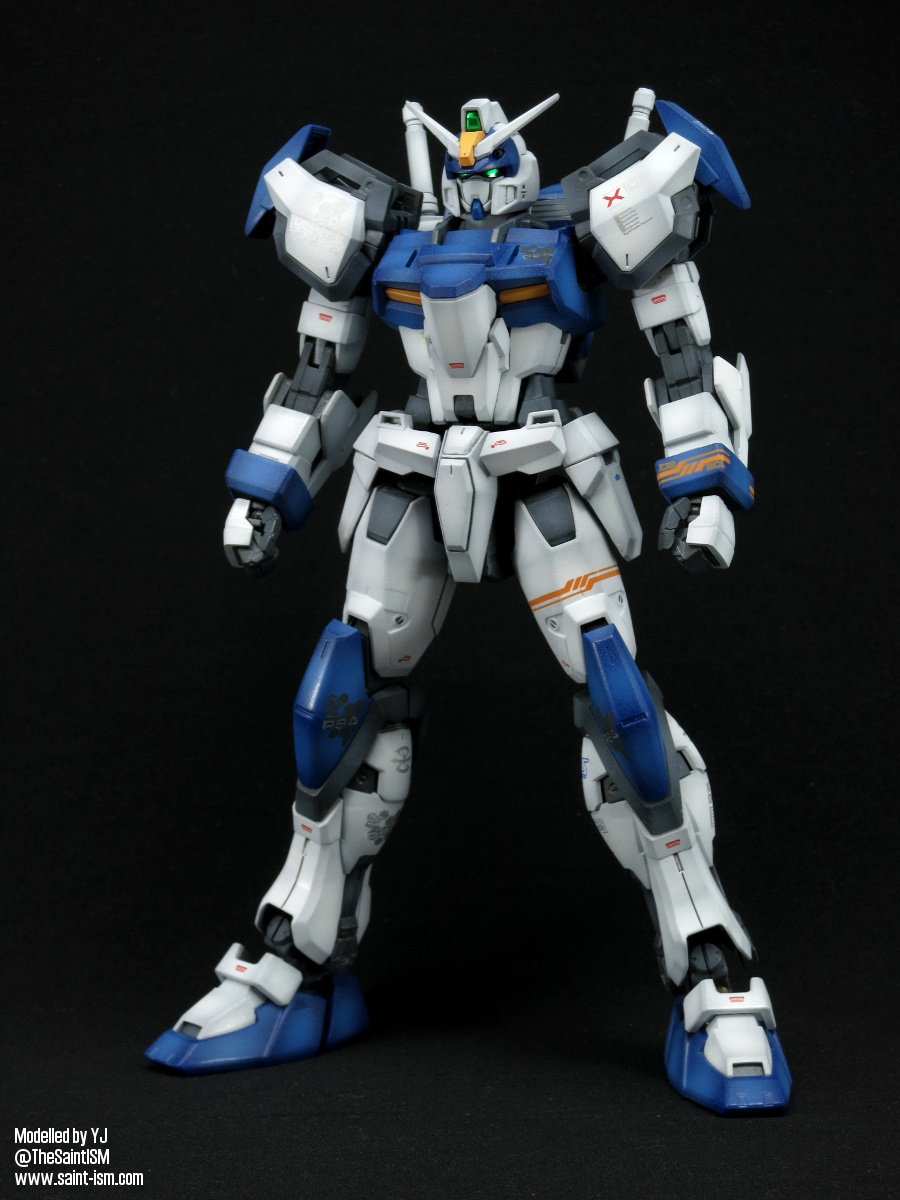
Number 3 in my GAT-X series build, is the Duel Gundam Assault Shroud. I started this kit in early June and finished it on 27th June. Despite being piloted by an asshole, the Duel Gundam is one of my favourite CE designs. There’s no wings or massive backpacks to be seen, only the essence of the pure Gundam design.
Construction
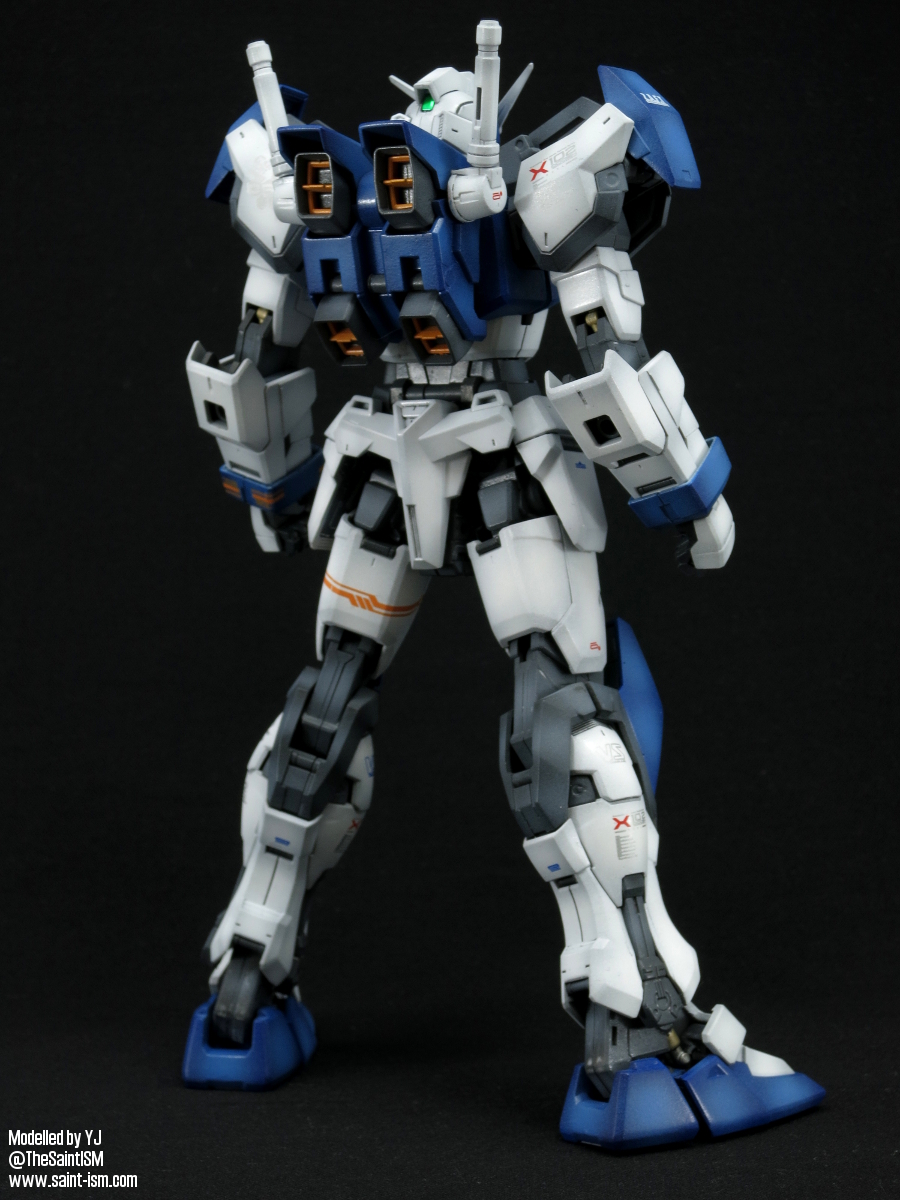
While the MS itself doesn’t have any seam lines, all of Duel’s weapons do, with the most noticeable ones being on the bottom of the bazooka and the top of the railgun. These bothered me enough to make me want to fix them, however this can cause some heartache, as they both have clear lenses which must be painted and inserted prior to sealing up the parts.
It’s a generally solid build all round, though I do find that the pegs on the beam saber holders are a bit tight once painted, it’s probably best to mask them off first if painting.
Painting

White – Neutral Grey (100%) base coat, following by White (100%) for shading
Blue – Blue (100%) base coat, added white for highlights
Orange – Orange (100%) base coat, starter white technique, followed by light coat of Orange Yellow (95%) + Yellow (5%). White is added for final highlights.
Inner frame/weapons grey – Neutral Grey (70%) + Black (30%) base coat, followed by Neutral Grey (90%) + Black (10%) for highlights.
Weapons light grey – Neutral Grey (100%) base coat, white added for highlights
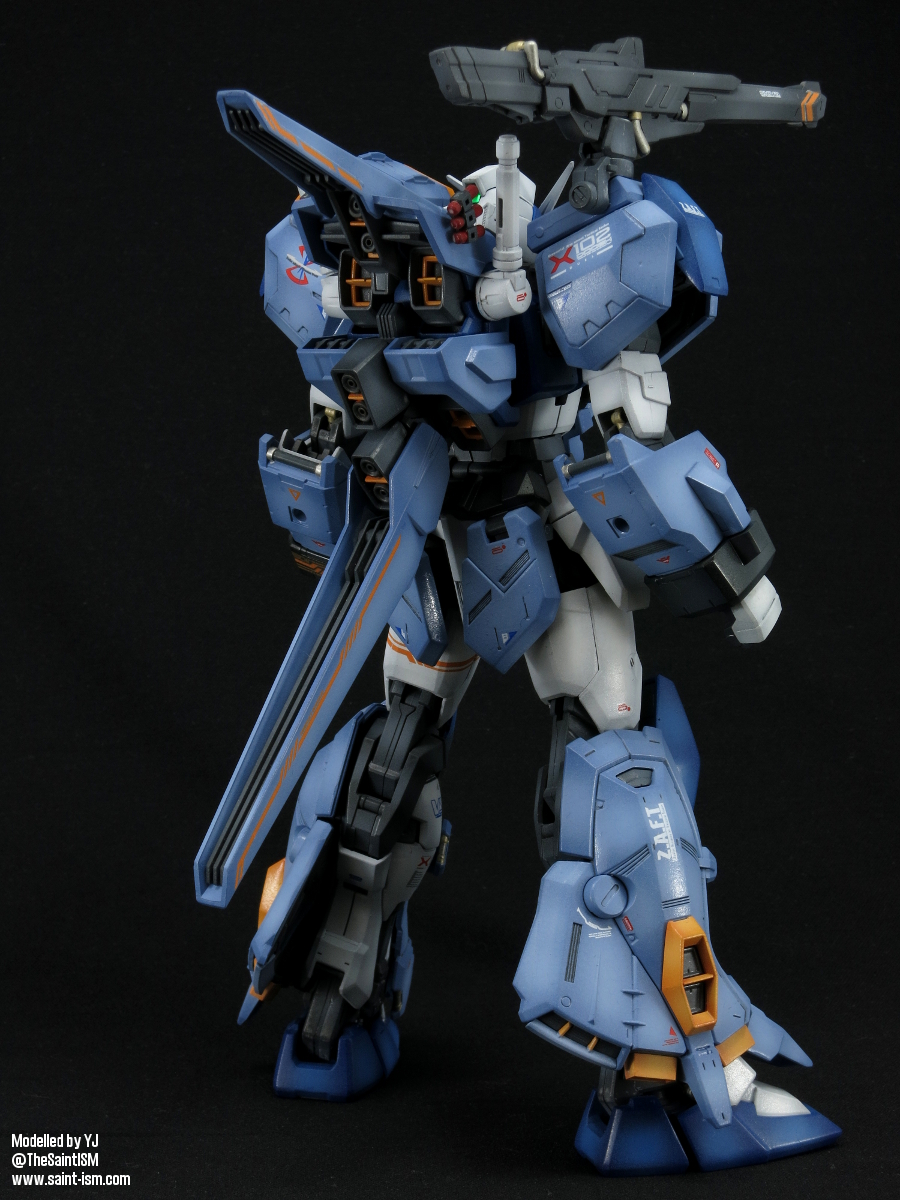
Assault Shroud Blue – I can’t remember the exact mix, since I deviated from the manual mix quite a bit. For a base coat, I used a mixture of White + Cobalt Blue + Blue Grey + Violet + Medium Blue as a base coat. I then added White for highlights.
There are some places where the pieces aren’t moulded in the right colours, these are the barrels and the rear of the bazooka, the ‘orange’ skirt guard on the Assault Shroud legs, and the thrusters on the Assault Shroud backpack. There are also plenty of little details moulded into the frame, armour and weapon parts such as pipes/vents etc, which don’t have to be painted per say, but do add a bit of character to the kit.
For panel lines, I used Tamiya Enamel German Grey. For the various details and pipes, I used a combination of Tamiya Enamel German Grey, Titanium Silver and Titanium Gold. The little ‘rockets’ on the side of the Assault Shroud backpack, I handpainted using Tamiya Enamel Red.
Decals, as usual, are from Samueldecal. For the most part they are excellent, however one criticism I have is that the the supposed grey decals are more of a reflective silver, making them hard to see under some lighting conditions. I did have a few decals break on me while I was placing them, these were the long ones that go onto the bazooka, tail fins etc, so be careful when putting those on.
Posing and gimmicks
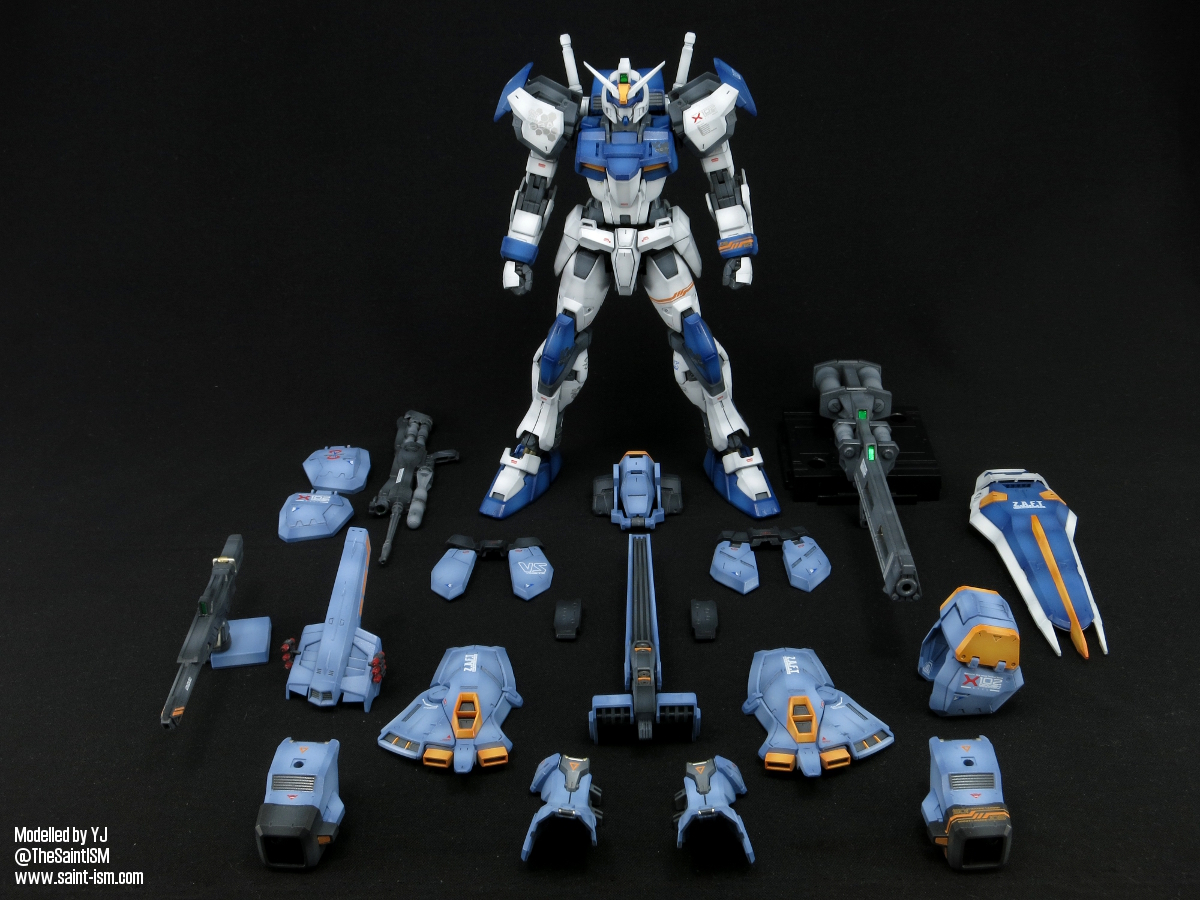
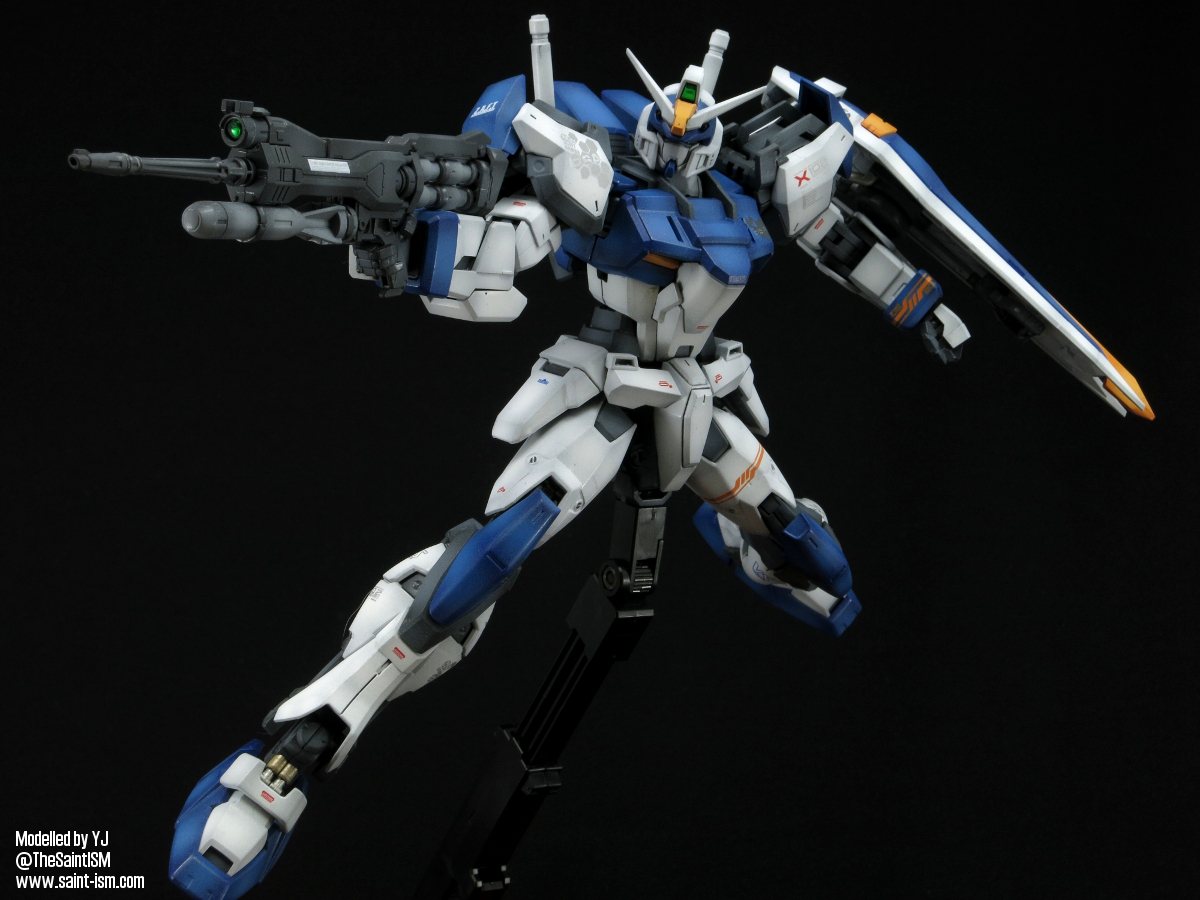
One of the great thing about this kit is the sheer amount of stuff you get to play with. You can’t help but feel that you’re getting your money’s worth with this kit. All three weapons are quite detailed, and the bazooka is quite large and impressive. You can even detach the Shiva railgun off the Assault Shroud armour and have the Duel hold it.
Speaking of holding, just with the rest of the SEED X-Frame series, the Duel comes with swappable fixed hand parts in various poses. The hands can hold the Shiva and Beam Rifle just fine, though you may need to use a little Blu-tack for that bazooka, just to make it a little bit more secure.
The kit is pretty posable in it’s stock form, however the story changes once the Assault Shroud is equipped, as the suit loses a bit of it’s flexibility due to it’s bulk, especially in the arms/shoulders.
One major problem I encountered when putting the AS parts on, was the front skirts. This is a problem which pretty much everyone ever building this kit has encountered, is that the pegs on the AS skirts just aren’t secure enough to hold themselves in place. To fix this, I had to put some Blu-tack onto the pegs, which made it stable enough to stay on.
A word of warning to those painting this kit. The Assault Shroud does attach by using friction to hold itself in place in some areas, such at the leg guards. The forearms also go on pretty tight, especially the black cuffs. Equipping the Assault Shroud is likely going to be a one-way ticket for your paint job.
Not only this, but I found posing with the Assault Shroud on was a nightmare. With the sheer amount of stuff clipped onto the main kit, there’s few places to actually hold it and adjust the parts without something falling off.
While at first I was pretty excited to get the Assault Shroud on, I think in the end I kinda prefer the simple look of the original Duel Gundam. This might call for a 2nd purchase of the kit sometime in the future.
Summary
+ Detailed frame and parts
+ Lots of extras and weapons
+ Beautiful proportions and posability in normal form
– Swappable hands
– Shroud parts will cause scratches underneath when equipping
– Shroud front skirts won’t stay on!
– Some annoying seam lines on weapons
– Cumbersome to pose with the Assault Shroud parts on
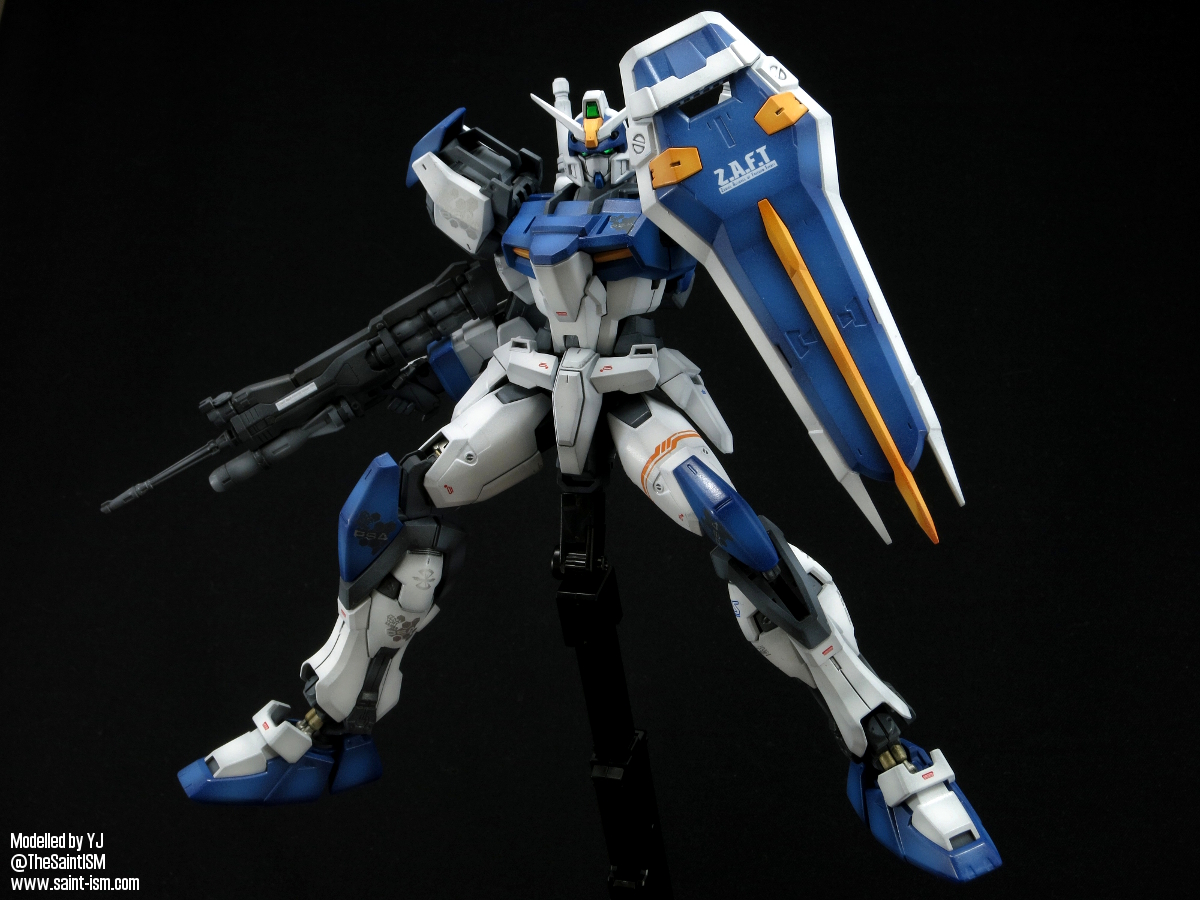
Duel Gundam


Weapons


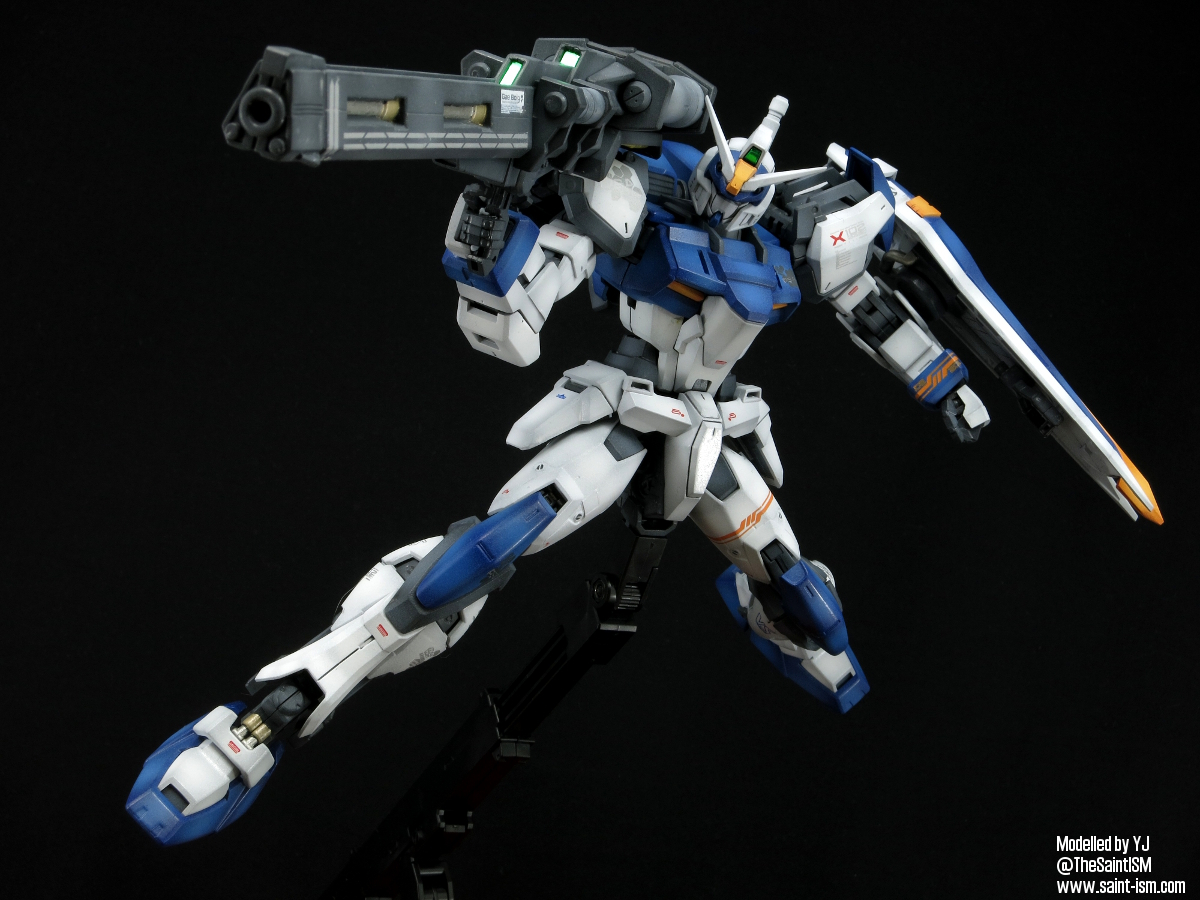
Action Pose


Assault Shroud


Weapons


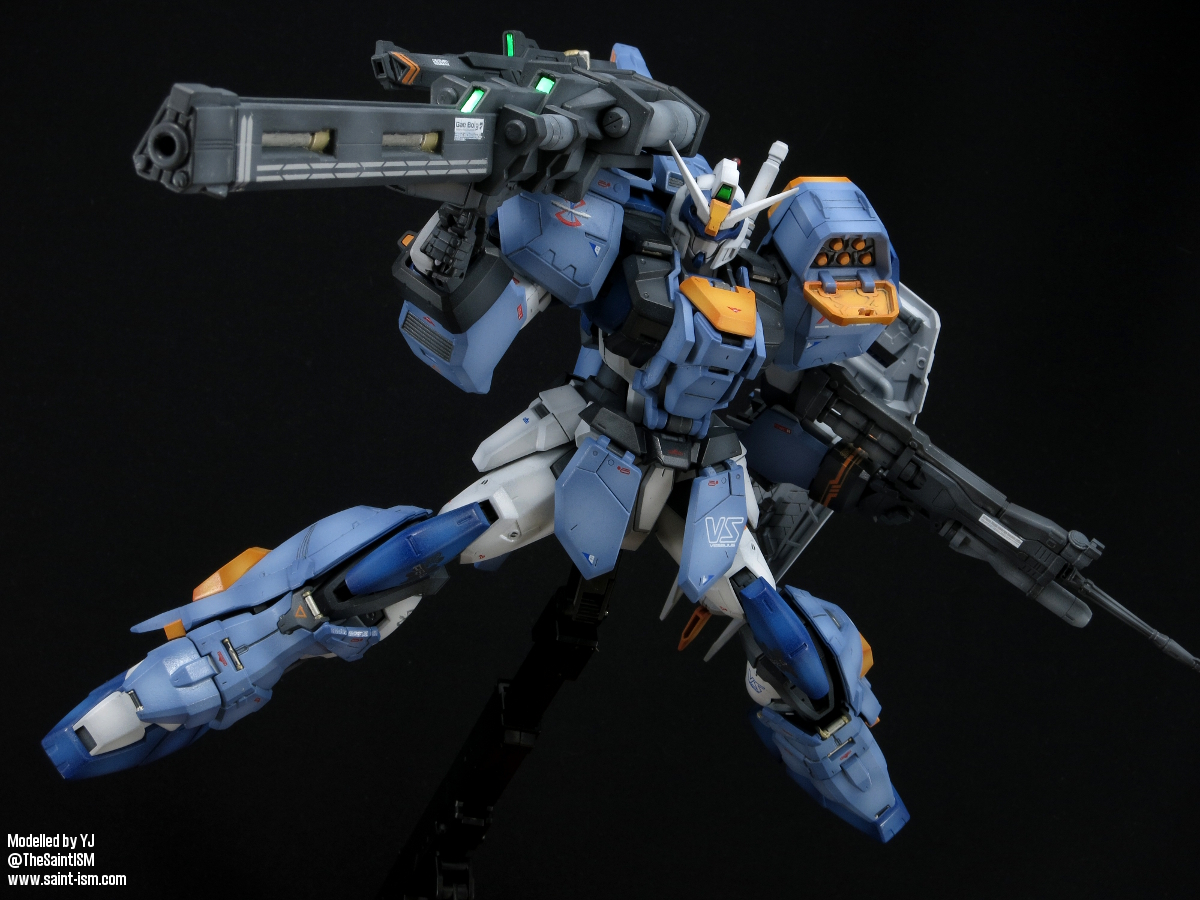
Action Pose


It seems I’m not the only one who likes the simplicity of the Duel. In a sense, it reminds me of the original Gundam (the RX-78).
Excellent job there, BTW. So, once the Blitz gets its shield back, the next kit will be the Buster, am I right?
very impressive build! I never considered getting one of these but I will now. What type of paints do you use? Majority of it as tamiya acrylics?
@ZeroMiles
Yeah even the Assault Shroud is a throwback to the FA Gundam. It’s funny because while building the kit I was so excited to put the armour on, but once I finished I kinda missed the Duel.
I should finish the Blitz and take photos sometime next week, once that’s done it’s straight onto Buster Gundam as you said.
@John
I use Gunze Mr.Hobby acrylics. There’s alot more variations in colours and the Gundam manual uses them for colour mixes. But you could potentially mix the same colours with Tamiya paints.