One of the key elements of taking a good photo is to ensure that your subject is well-lit. This can be achieved in many ways, as long as the light source you are using is not pointed directly at your subject. This causes harsh shadows, overexposure and an overall washed out image that is lacking in details and depth.
In this article we’ll discuss some ways to create a better lighting setup for your scale photography!
Indoor shooting
Using a window / natural lighting
The easiest way to get some natural lighting is to shoot next to some kind of window.
This doesn’t really need additional equipment but you’re limited to shooting when the sun is out, and some days may provide better light than others depending on the weather. You may find that you still need some additional lights or a reflector to help balance out the shadows from the natural light.
It’s definitely not ideal and we should move on to how to create a more stable photography set up.


Some of my early photos when I first started to take photography a bit more seriously. I took these pictures next to a window with no extra lights or reflectors. The lighting and colour tones are extremely variable depending on the time of day and weather.
Diffused Lighting
What we should aim for in our indoor set up is to somewhat emulate natural outdoor lighting in a controlled environment and we can do this through diffused lighting. By passing light through a white cloth or bouncing it off a surface we are scattering it so it is less harsh on the subject.
The important thing to note that is this can be easily achieved with everyday household items. In fact all you need is a desk lamp, some thin materials like tissue/tracing paper/bedsheets to drape over it and you’ve got yourself a DIY diffuser!
Single light setup with reflector
The most basic setup uses a single light source and a diffuser. I’ve included some pictures from an “how to photograph Gunpla” exhibition from Chara Hobby 100 below. They use some tracing paper over a photo frame with tracing paper as a diffuser as well as a reflector. The reflector is essentially a flat white or reflective surface (such as a piece of white paper, cardboard or white wall or mirror) that can be placed opposite light sources to help balance out shadows.


Example of a DIY setup from a photography exhibition at Chara Hobby 100 using a desk lamp and picture frame with tracing paper as a diffuser.
See this article for a list of DIY reflector options.
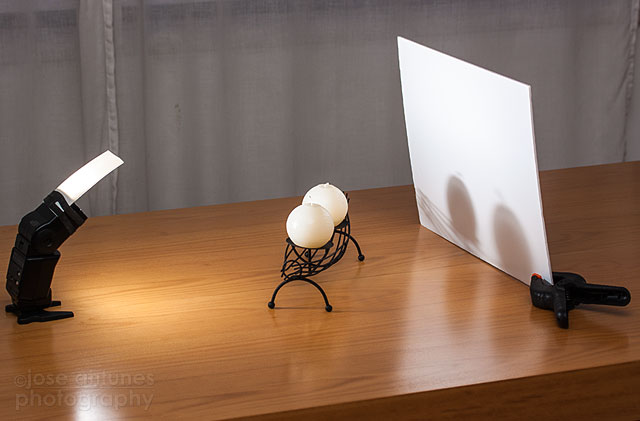
DIY reflector option using a piece of white cardboard. The reflector helps balance out lighting and shadows cast from opposite the single light. Source: EnvatoTuts
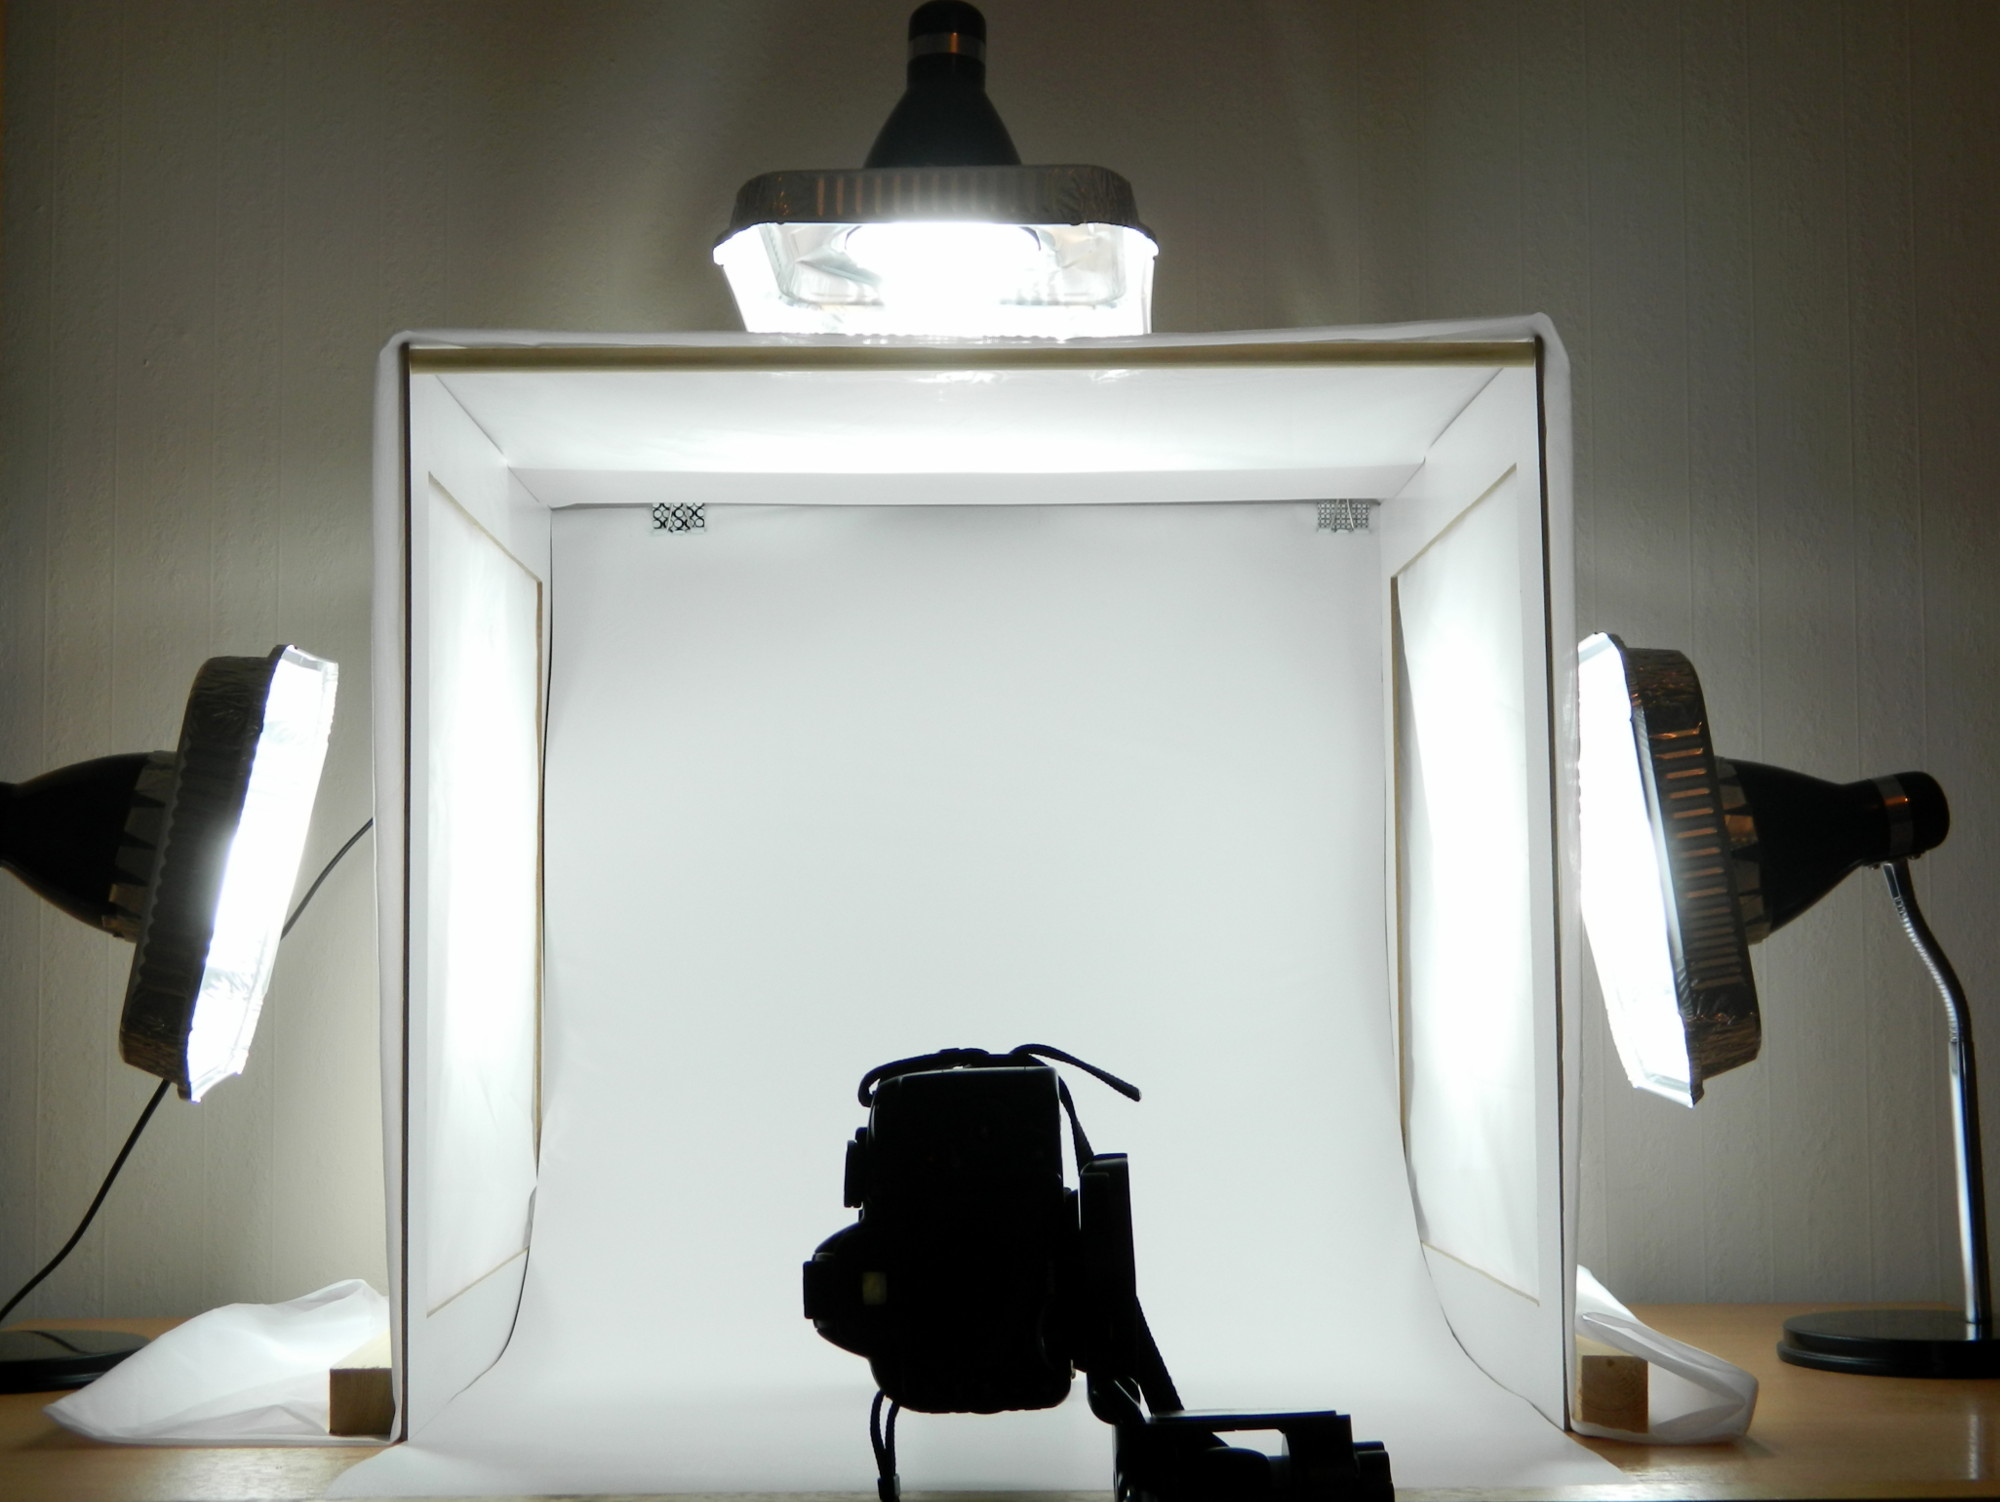
Lightbox/Light tent
A lightbox/tent is a fixed size box that relies on diffused light through the sides and top to provide soft lighting. These can be purchased premade or there are many DIY options available using cardboard boxes or plastic tubes to create a frame, and then using stuff like tissue/tracing paper/muslin cloth as diffusers on the sides and top of the box. The idea is that the box itself creates a “closed” environment where the light continues to diffuse in.
These don’t take up too much space, but the problem is that you are limited by the size of your box. If you’re planning to build or buy one, I recommend at least 60cm3 or 24 inches if you’re planning on photographing MG kits. Any smaller and you may have trouble fitting poses on an action base.
Amazon has plenty of affordable premade options for around $20.


Example of using a premade photobooth purchased from Amazon. Even an iPhone can produce good results with a simple lighting setup and a tripod. Credits to /u/holocause from Reddit.


Example of an actual photobooth used by Hobby Japan to photograph kits. The setup uses tracing paper mounted on a plastic frame, 2 side and 2 top lights.
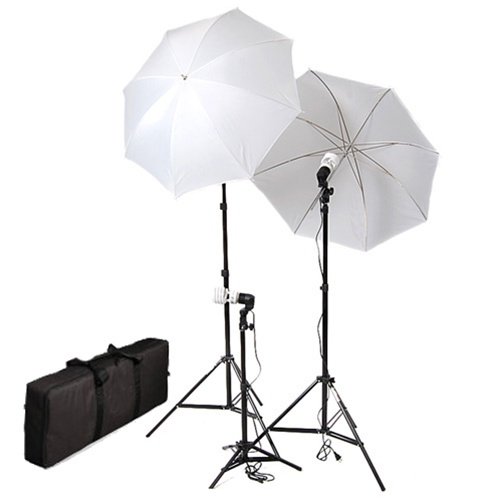
Umbrellas
Umbrellas act as somewhat of a reflector or diffuser, depending on the type of umbrella. If you’ve ever walked into a professional photography studio, you might notice this is how they are set up.
The advantages of using umbrellas is that they give you much more working space when dealing with big kits and posing. It’s pretty much necessary if you’re working with kits like Neo Zeong and Perfect grades, but an umbrella setup also requires more space. Unless you have a dedicated room for doing photoshoots you’ll probably be hard pressed to find the space for table, umbrellas, camera, reflectors etc. I believe Mr Falldog from OtakuRevolution uses this setup. If I had a spare room in my house I would too!
Troubleshooting
Don’t be afraid to add extra lights or reflectors to your set up if you find there are still too many shadows. I previously only used top and side lights, but I eventually found that I could get better results by adding two front lights.
More examples from the Chara Hobby 100 “How to shoot Gundam” exhibition. Step 5 shows how pointing a light directly can cause overexposure and heavy shadows. Step 6 adds the DIY diffuser.


Step 7 adds a reflector diagonally forward. The reflector is rotated around to the front so that the front is better lit. The article also mentions that there’s no wrong way to light your model and is up to the photographer’s preference if they want the shadows in.
Backdrop
I thought it might be worth giving the backdrop a quick mention. Backdrops are great because they help keep your object in scale by reducing distracting elements in your shot. You can see in Bandai’s promo images below that the transition between the floor and the background is seamless. You can achieve this effect by using a large single piece of paper/cloth that gently bends as a backdrop.
Over the years I’ve seen/heard people using cardboard, cloth, perspex; really anything you can get your hands on or are willing to purchase is open season.
As for colour, the choice is really up to you. Bandai themselves have used many different backdrops over the years, from blue, black, grey and white. Choose whatever suits your style or kit! I personally like black because it gives the model itself a high contrast.


More examples of official Bandai photography
Outdoor shooting
One disadvantage of shooting outdoors is that you lose some sense of scale of the model due to the lack of a proper backdrop. While I don’t have much experience in outdoor shooting, it’s proven that you can still get some amazing results. Look no further than Lightning Ace’s blog who has some of the best outdoor Gunpla photography and poses I’ve seen online. Consider using reflectors to balance out heavy shadows caused by sunlight.


Examples of outdoor shots by Lightning Ace
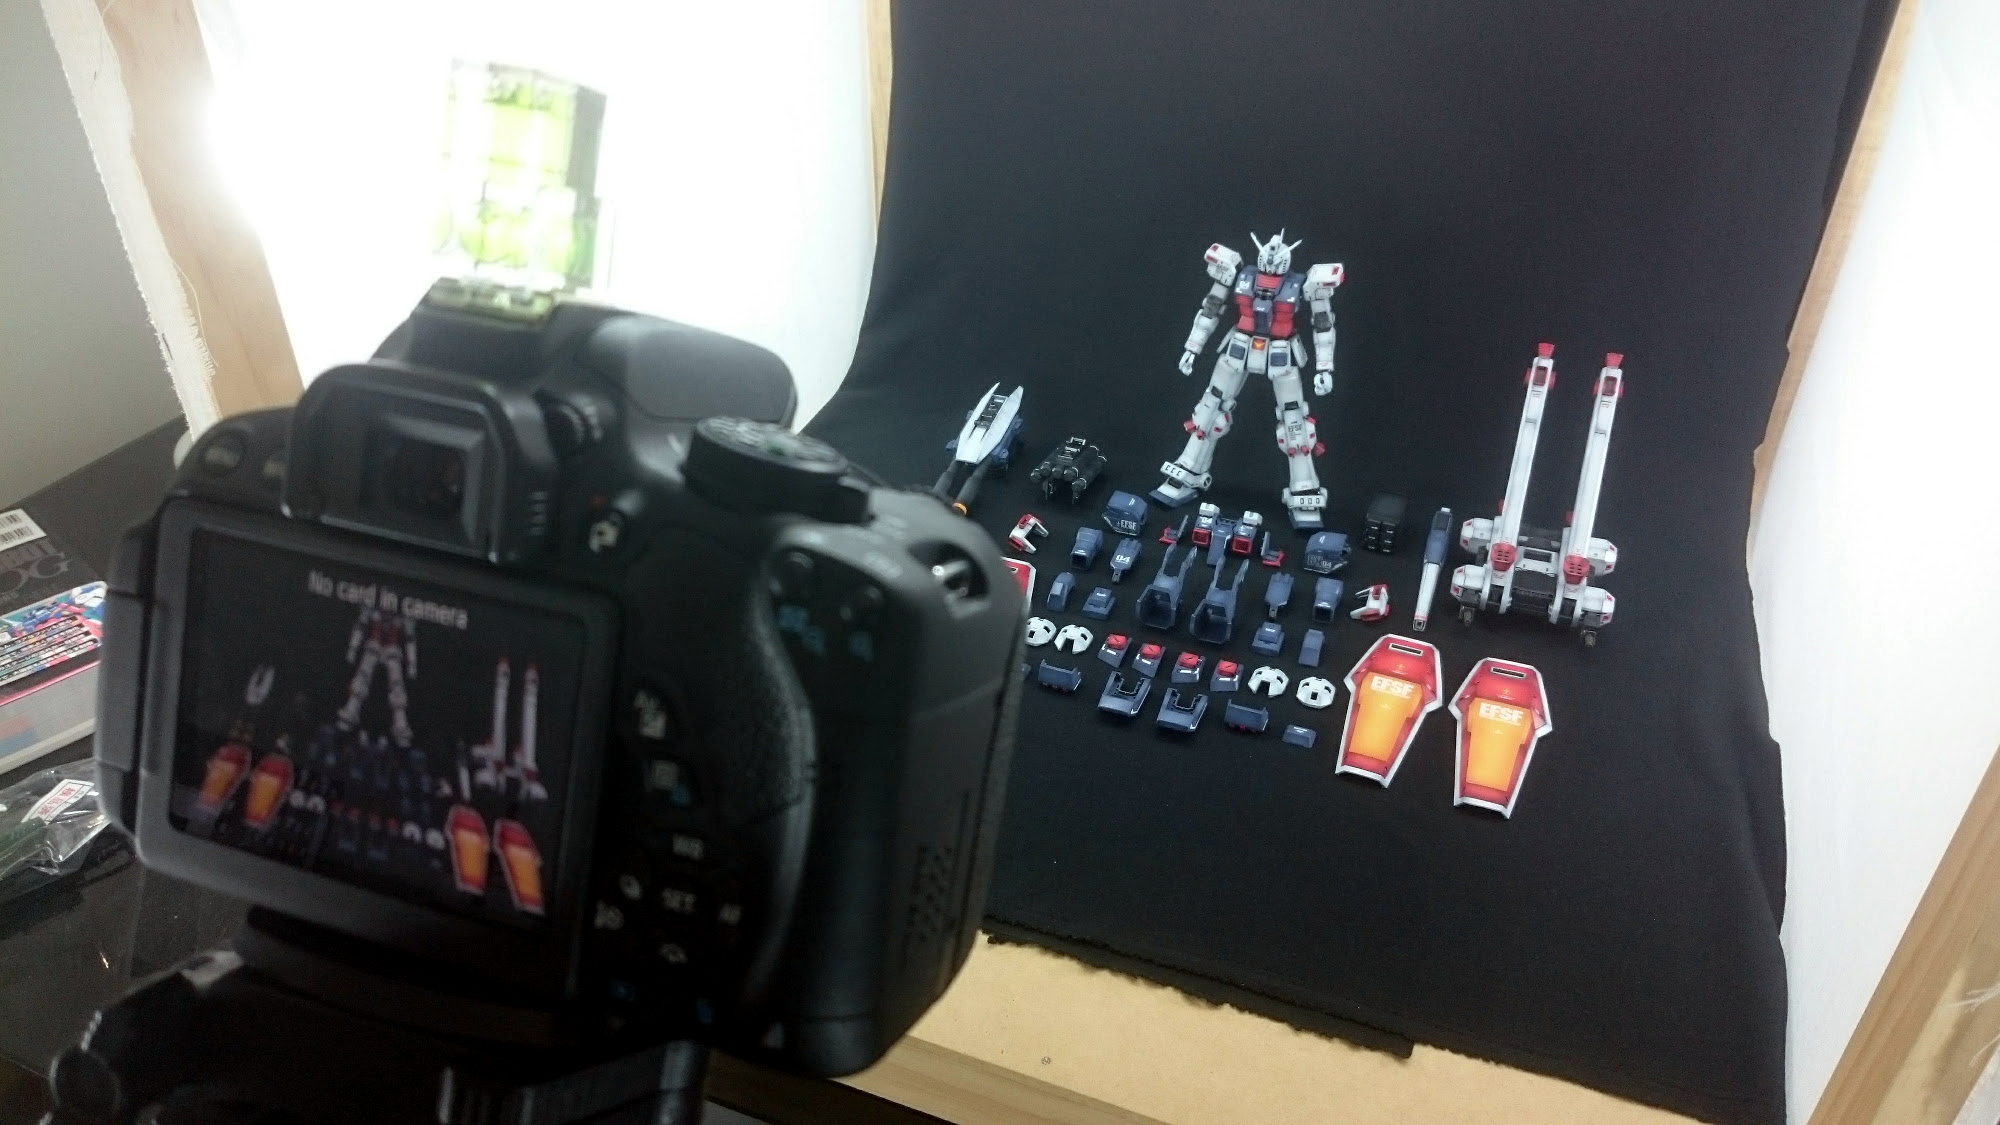
My setup
I use a custom built (thanks to dad!) wooden light box for all my photoshoots. The specs are as follows:
- 60cm3 wooden box
- 6 x 6500K 100W equivalent LED lamps
- White A4 paper as reflectors for the front lamps
- Black cloth backdrop
This size fits MGs nicely though the frame can get into view when full-frame posing. You could take pictures of a PG standing but not posing.
The lights are just ordinary desk lamps positioned at the top, sides and front. I have some white cloth draped over front lights to act as diffusers. I also move these front lights during the photoshoot to help balance out the lighting as I rotate the model.


Final words
This concludes this tutorial section on lighting. I hope this shows you that you can greatly improve your photos with some cheap or DIY options!
Also please consider becoming a Patron or donating if this guide has helped you! Thanks!

[…] been hard to shoot some kits in it since 16″ doesn’t quite give enough space. Saint-ism has a very good series on photographing kits though, and recommended a 24″ booth. I set up a […]