
My first completed kit of 2014, I started this MG Zeta 2.0 back in mid January and finished it on the last day of February. Unfortunately I’ve been a bit lazy in documenting my WIP progress, due to several interruptions during the build such as my Chinese New year holiday to Malaysia, so we’re skipping right to the finished product for this build.
Construction
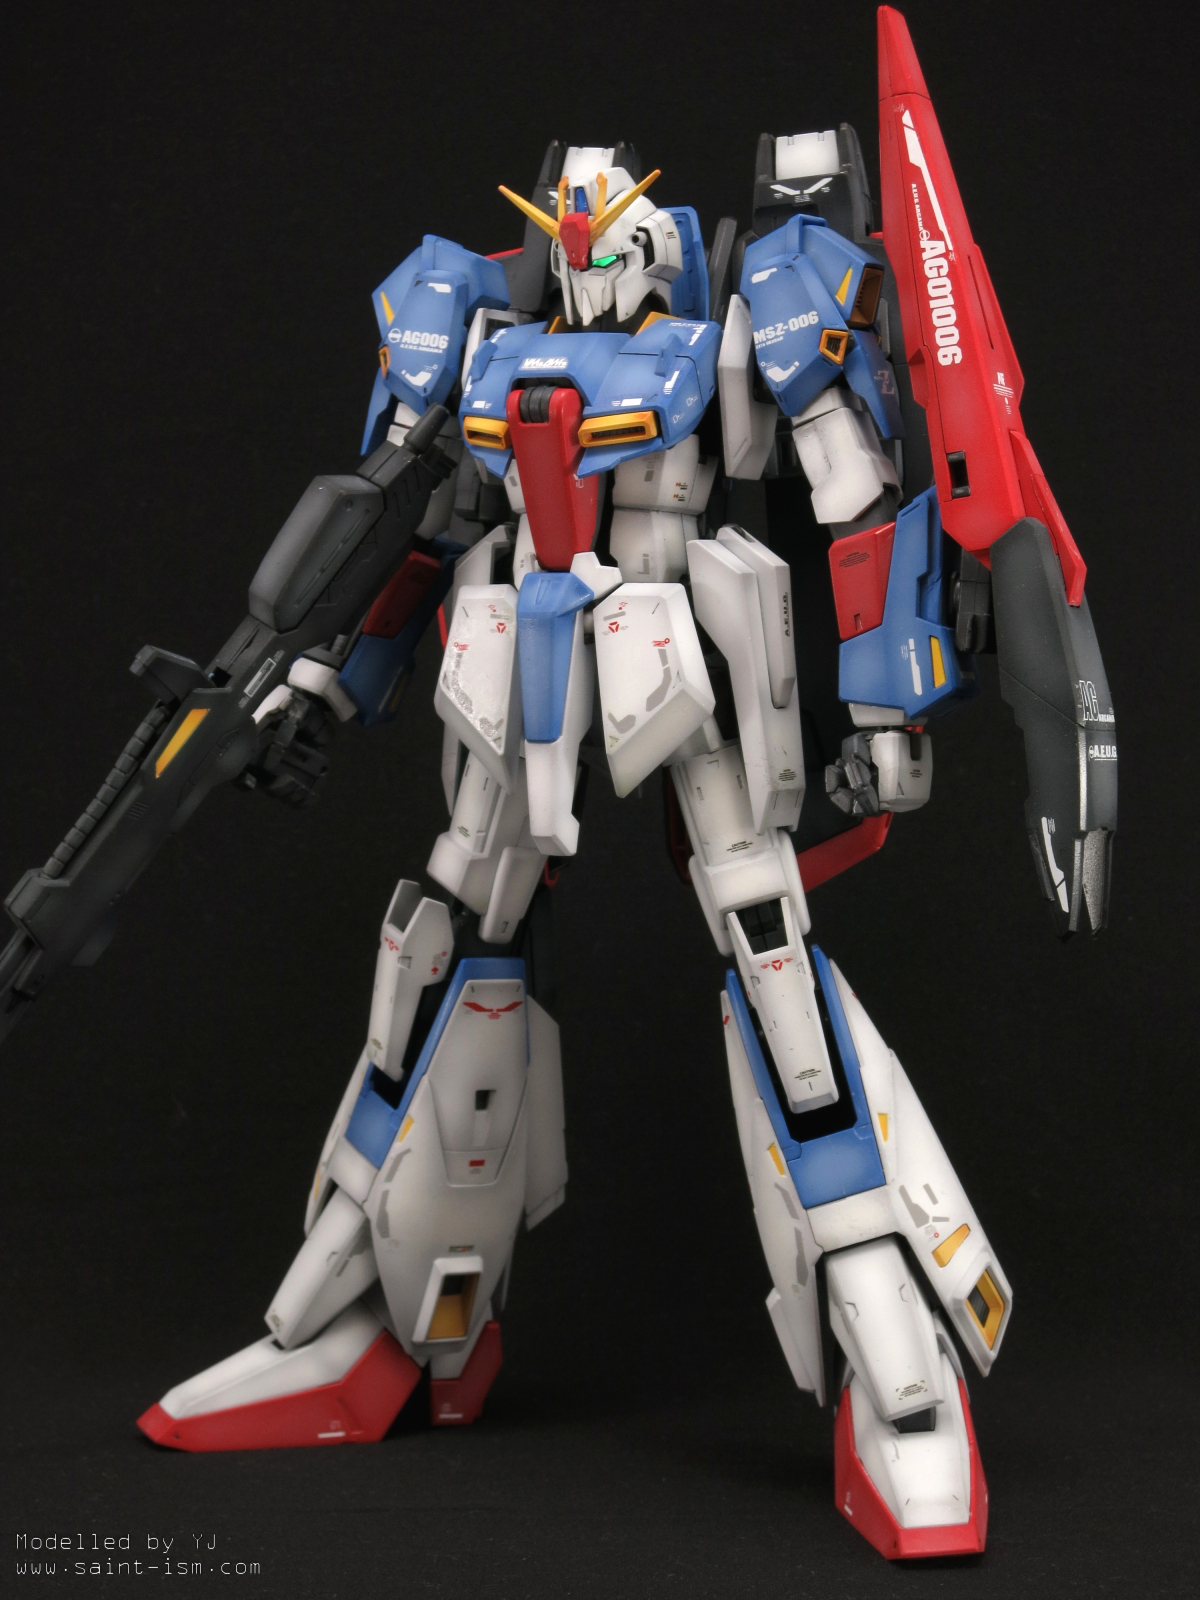
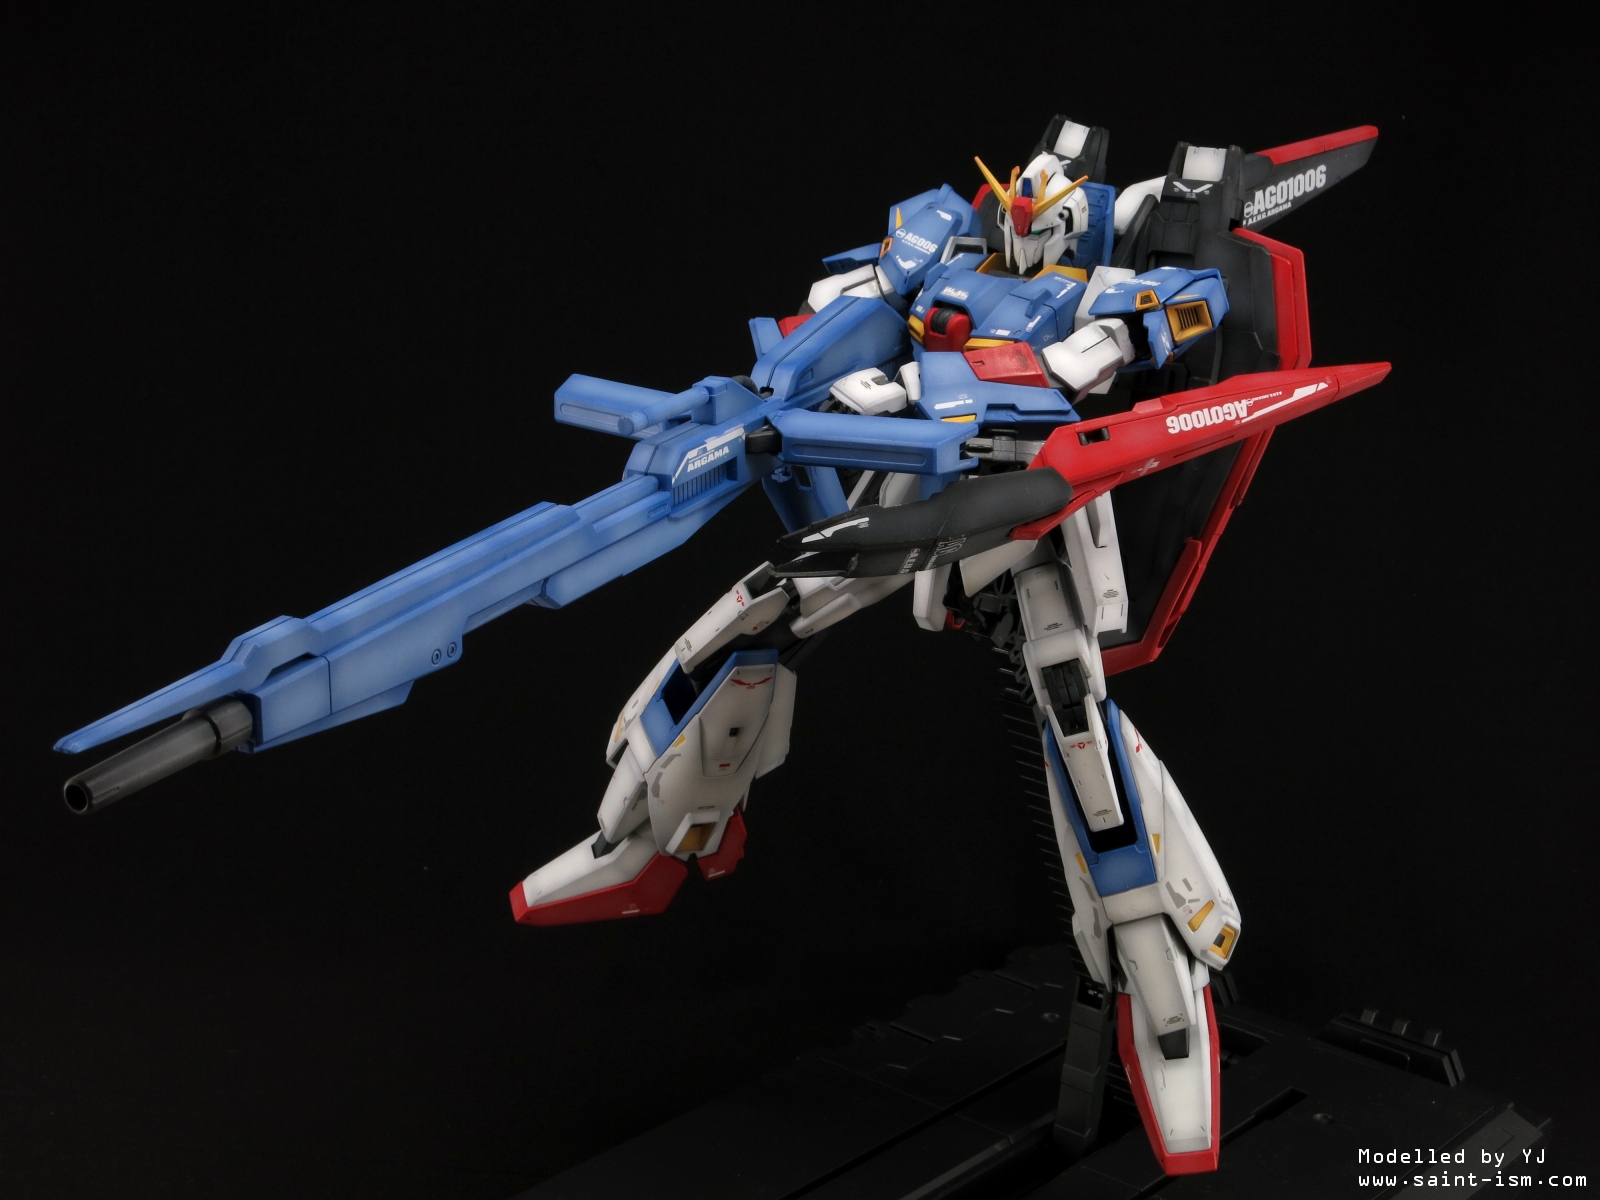
The MG Zeta 2.0 is a pretty solid build. Complicated, but solid. The kit still looks great despite being released almost 10 years ago, but the new RG has it beat in terms of proportions. The kit takes cues from it’s PG counterpart and includes various locking mechanisms for the wings and legs so they don’t flap around like the old MG, although this does mean there are a ridiculous number of little parts and mechanisms that have to be assembled. I think the kit has over 400 parts!
There are also very few seamlines to fix. The only real major one is the E-PAC on the beam rifle. Despite being molded in two halves, the Hyper Mega Launcher and Beam Rifle are designed to have a panel line where the two parts meet. If you are OCD about fixing these, be prepared for alot of masking.
One thing that does concern me is the use of a ball joint/polycap to connect the arms to the chest as these tend to wear out over time. While holding the beam rifle may not be a problem, I intend to pose mine holding the HML, which could make the arms sag over time.
Another mistake I made was when cutting off the yellow vent parts off the tree. I accidentally cut too much off the side and as you can see there is a small gap on the sides.
Painting
There are quite a few details on this kit which are not colour correct, most of these are the tiny yellow highlights on the shoulders, legs, forearms and the beam rifle. Pretty much all of these need masking to paint. I ran into a tiny issue where I was lazy and didn’t mask entire parts when painting the yellow, and this caused a bit of yellow overspray to get onto the parts. I had to respray certain areas to patch these up and I guess I learned my lesson and will properly mask the entire piece next time.
White – Preshaded with Neutral Grey (60%) + White (40%), then pure White was used for highlights. Though I wish I went over with another coat, since it looks a bit off-white.
Blue – Cobalt Blue (50%) + White (30%) + Bright Blue (20%) + Little bit of Fluro Pink. White was added into the mixture for highlights.
Black – Preshaded with Black (100%), added White for highlights. The MG manual recommends a very dark blue for these parts, I instead chose to opt for the RG style black instead.
Grey – Black (40%) + Neutral Grey (60%) base coat, followed by Neutral Grey (80%) + Black (20%) for highlights. Because there was so much Black in the base coat, this ended up darker than I’d hoped for.
Red – Red Madder (50%) + Shine Red (50%) + tiny bit of Orange base coat. Added White and Neutral Grey for highlights. Despite most Gundam manuals recommending 100% Red Madder, I think Shine Red (an orangeish red) is much closer to what the kits look like in the manual photos.
Yellow – Orange (100%) base coat, followed by Starter white, followed by light coat of Orange Yellow (80%) + Yellow (20%). Finally white is added into the mixture for some highlights.
I used Tamiya Panel Line Accent Colour (Grey) for the white parts, everything else I used the Black version.
Decals
I used RG Zeta styled decals from Samueldecal. You can see it here. I also had the official MG Zeta decals from Bandai on hand, but they were from 2006 and the sheet was starting to go yellow, so I could only use the non-white decals from that sheet :(.
I made a mistake by putting on the official VMsAWRs decal first, after a while I noticed it was very yellow compared to the other RG-styled decals. I wasn’t willing to strip and repaint, so I put the RG styled on on top, unfortunately it didn’t cover too well and you can see a bit of silvering underneath. Lesson learned, don’t ever use a decal sheet if it looks yellow!
Speaking of the RG decals though, they are quite nice. Even though the proportions of the MG and RG kits are different, they still fit decently well, although you might have to get creative and split/move decals in certain areas. These include the shoulders, shield, wings and chest. At first I thought the RG decals might make the kit look a bit ‘noisy’, but in the finished product they don’t look too obtrusive.
This was also the first time I used decals from Samueldecals, overall the quality is really good. The colours are quite vibrant, and the decals are thinner than Bandais, so after using Mark Setter they blend in really well. Despite being thinner, I only had 1 case where the decal I was working with broke, though that was probably my fault. I can definitely recommend using Samuel, at least for the newer decals anyway.
Posing
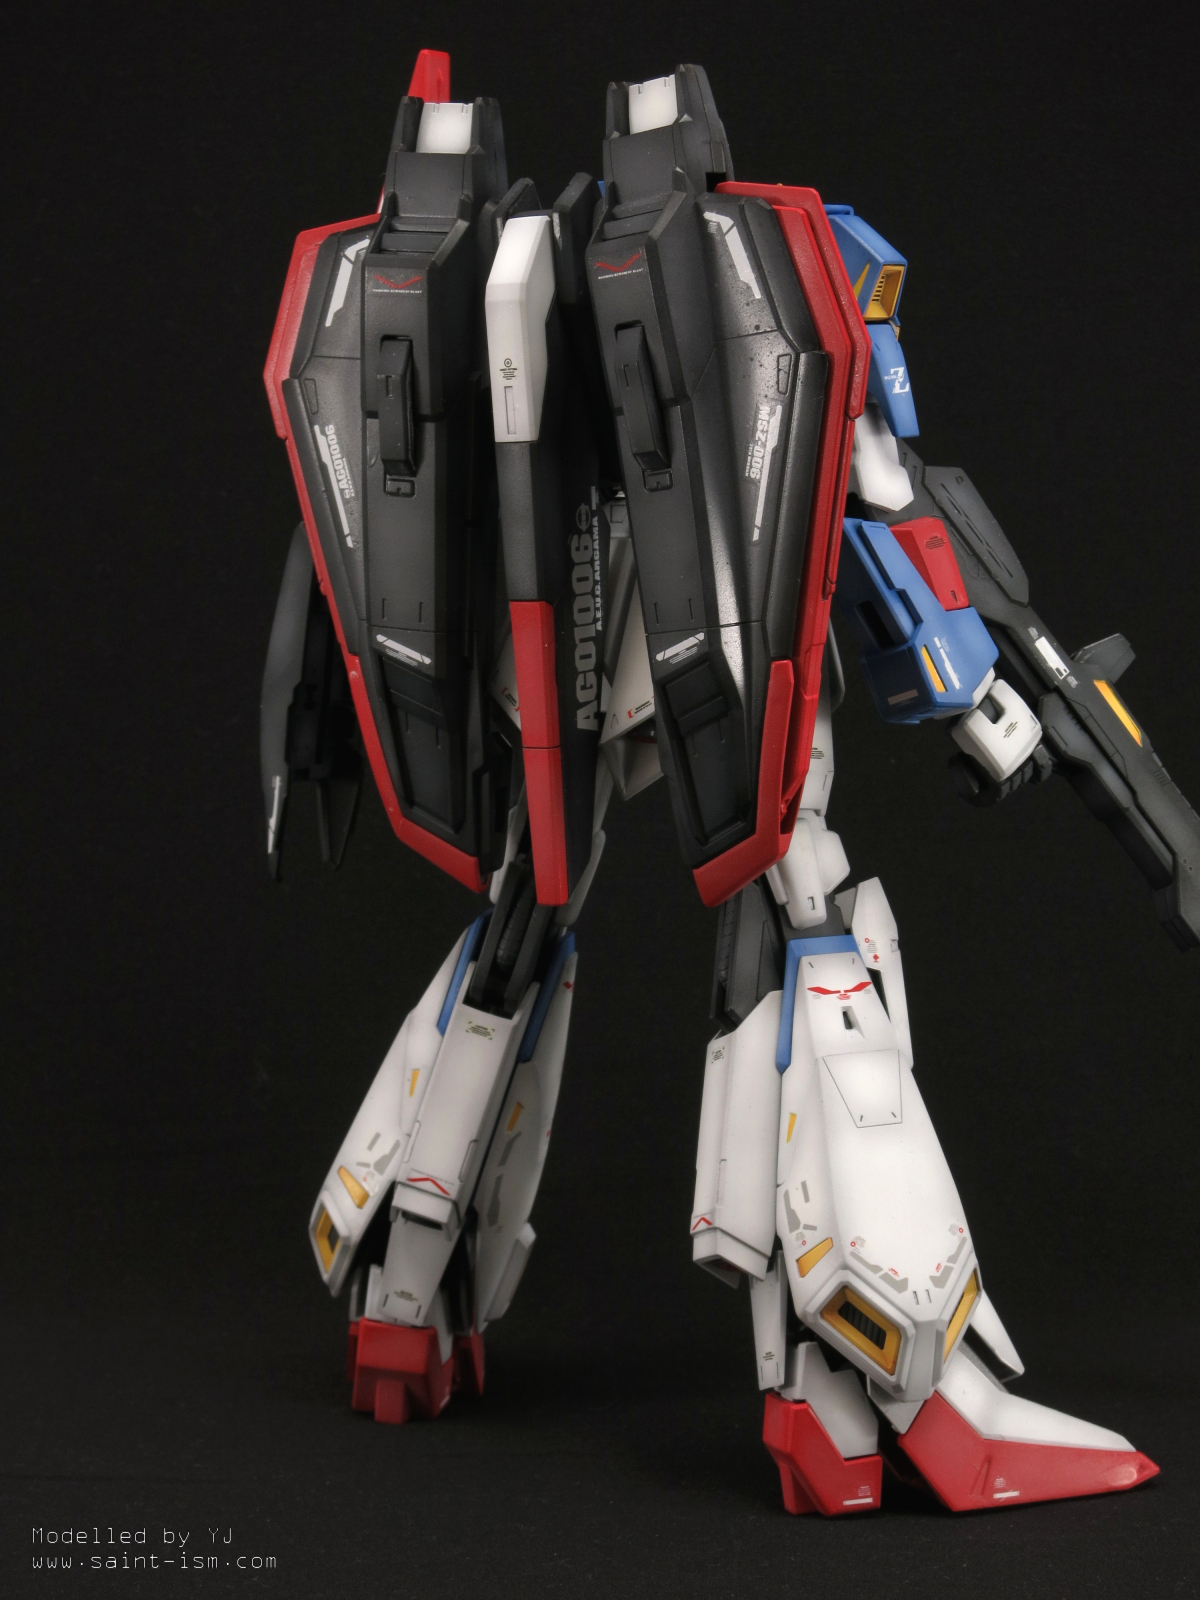
Even with the massive backpack, the kit can manage to stand up, though you’ll have to lean him forward ever slightly. This does limit the ability to pose the Zeta on the ground though, but that’s okay since he’ll mostly be sitting on the stand, which also doubles as a ‘launch catapult’ diorama that’s similar to the Aile Strike’s.
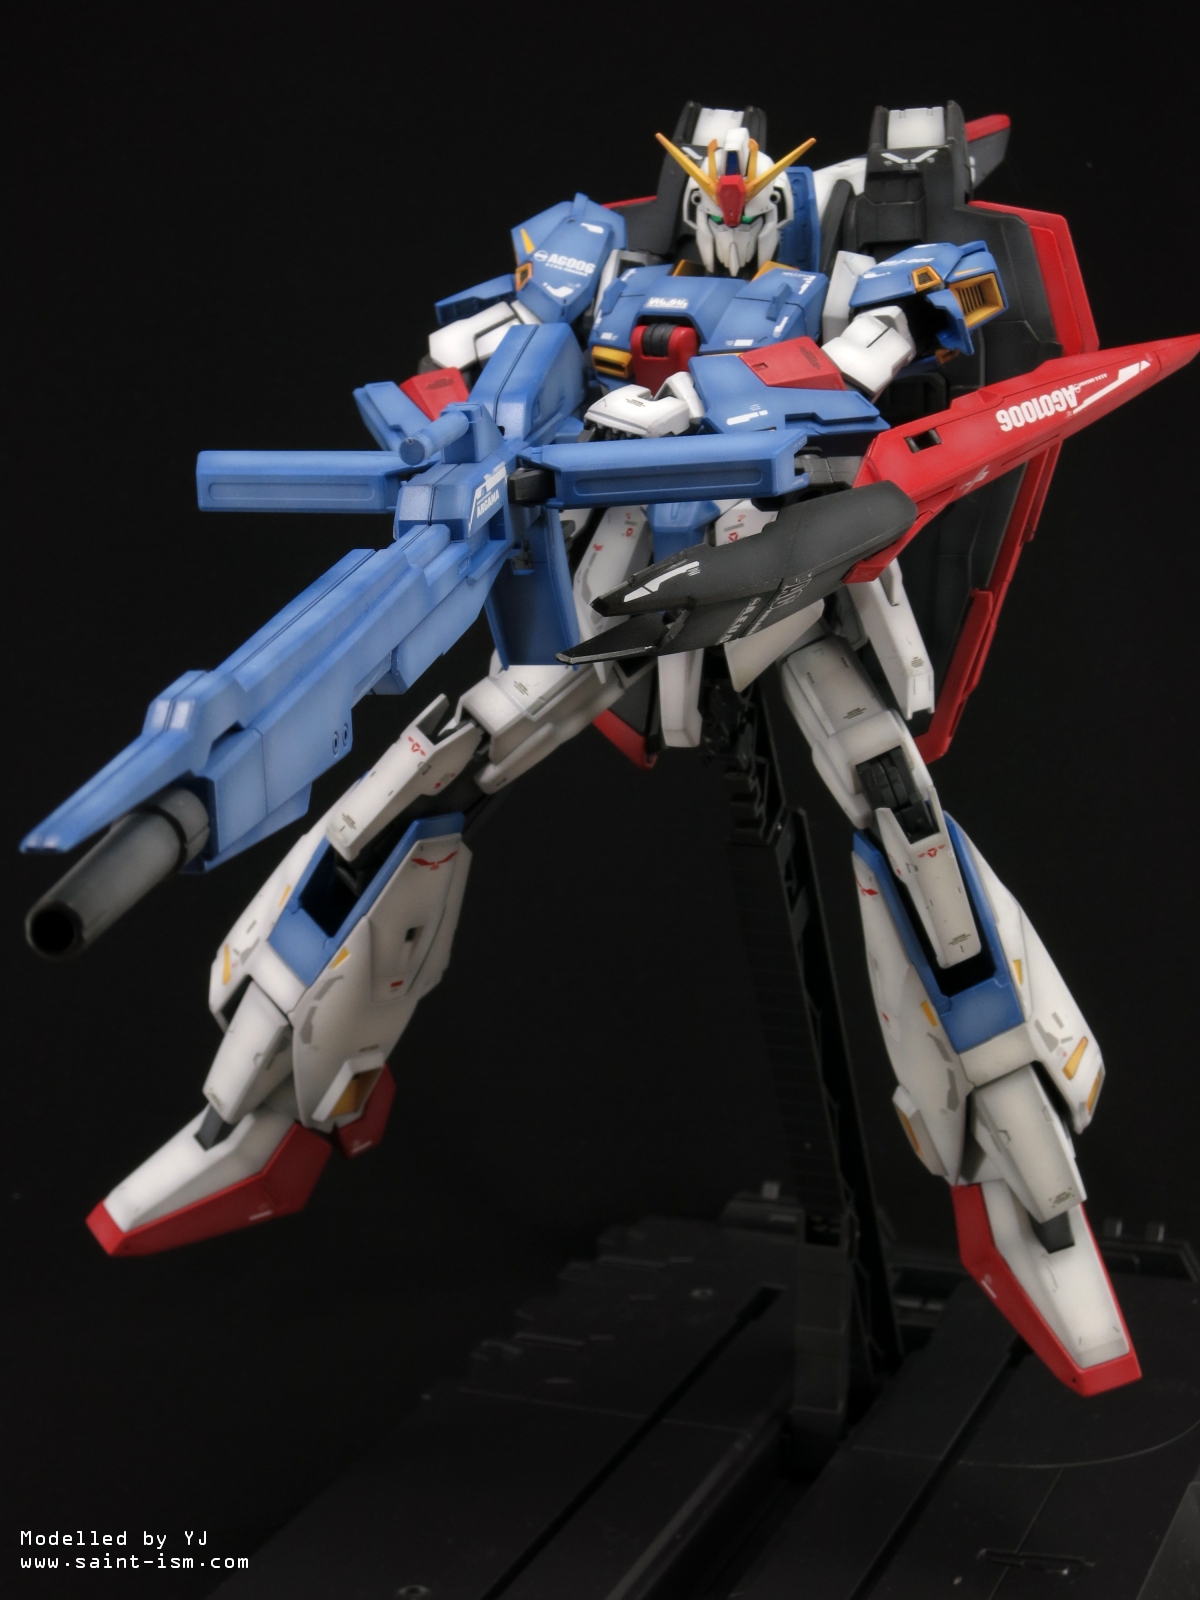
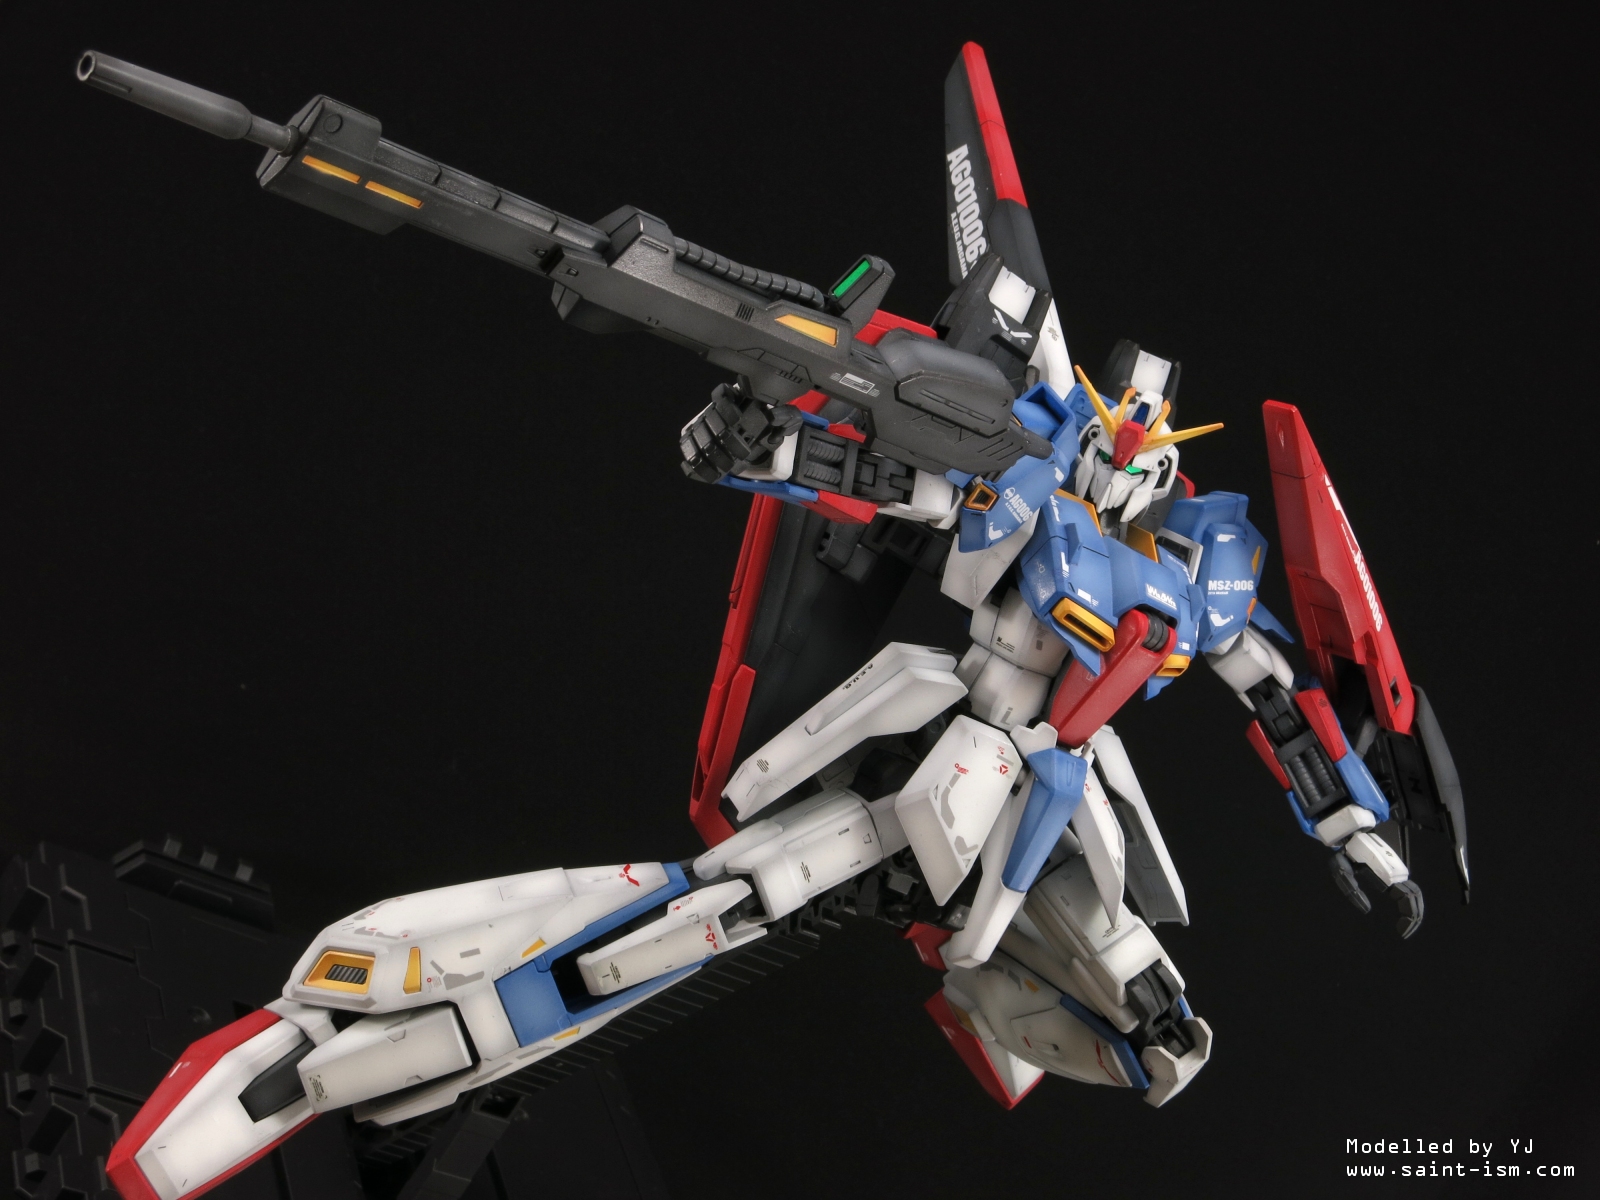
Despite all this, I find posing this guy is a bit…troublesome. The oldschool design of having the shield mounted on the back of the arm really annoys me as it’s hard to put the left arm in such a way that complements the rest of the pose.
The rifle handle is also really long which can make it look a bit goofy at times, and the peg which is supposed to help secure the rifle in place is pretty fiddly.
You also get two grenade packs which can fit onto the back of the arm. Pushing these forward can make the grenade hatch on the wrists open and the grenades pop out. I chose not to use these as they make the arms even more cumbersome to pose, not to mention that they occupy the same port as the shield.
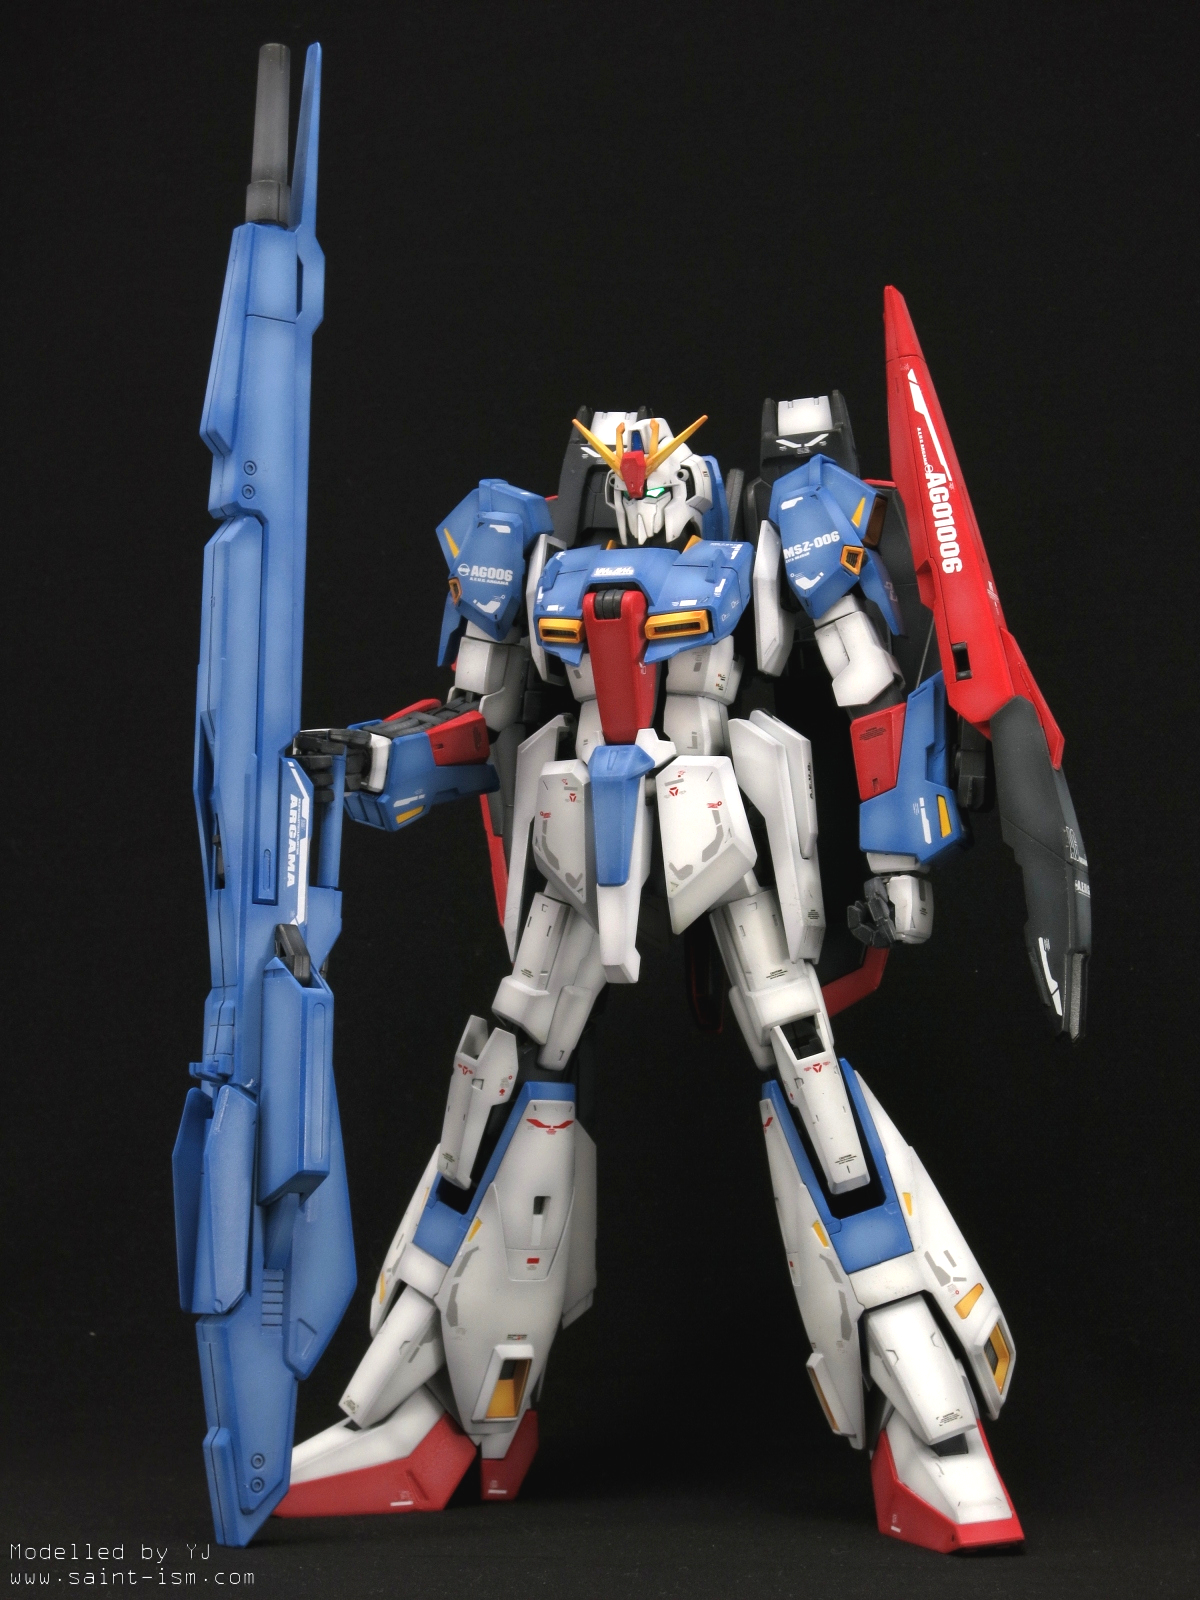
Posing the kit with the HML can be quite tricky, due to it’s massive size. Forget about connecting the peg on the handle to the hand, instead focus on trying to to get the fist under the base of the HML. In the photos I took, the entire weight of the gun sits on the right fist.
I don’t intend on transforming this kit due to scratches so I can’t really comment on the Waverider form.
Summary
+ Still looks great after 10 years
+ Large display stand included
+ The kit can actually hold the HML
+ Locking mechanisms keep the kit stable despite transforming gimmick
+ Almost no seam lines
– Shield mounted on back of arm prevents some expressive poses
– Hands have some trouble holding the beam rifle
– Quite a few colour incorrect details
– ‘Panel line’ on the HML/Beam rifle may bother some people
Zeta Gundam


Action Pose


Nice!! It look good
I began to play gunpla just at the beginning of this year and i want to customize mine, so, do you have any tip for coloring?
I want to begin with 1/144 scale
This is my dream project
http://ngtirose.deviantart.com/art/Gundam-Breaker-Combat-UC-439204700
@zxyu0369
Are you asking about painting tips?
There’s a quite a lot on the subject, but I can say use primer on the plastic before you start painting, it helps the paint stick a bit better.
Also are you using airbrush to paint or hand painting?
i do not have airblush i think i should start with sprey or paintout
@zxyu0369
If you use spray can, be sure to spray light coats from a distance. Also use a ‘gas mask’, the paint has toxic smell.
@YJ
OK thank you
Looks good. I’ve been debating getting this kit. I’ve wanted to do a nice zeta but was leaning more towards the rg, but this looks great! I’ve got several projects going right now but this will be put on the list. Fantastic work!
I’d like to ask will the paint be strong enough to hold the transformation? even with a top coat. or u did not transform it or play with it again after painting it.
@Ndf
People who paint kits normally don’t like transforming them because there are alot of moving parts and generally moving parts = light scratching, even when with top coat and doing normal poses.
Normally after I finish taking pictures I don’t touch the kit ever again.