*** NSFW Warning below! ***
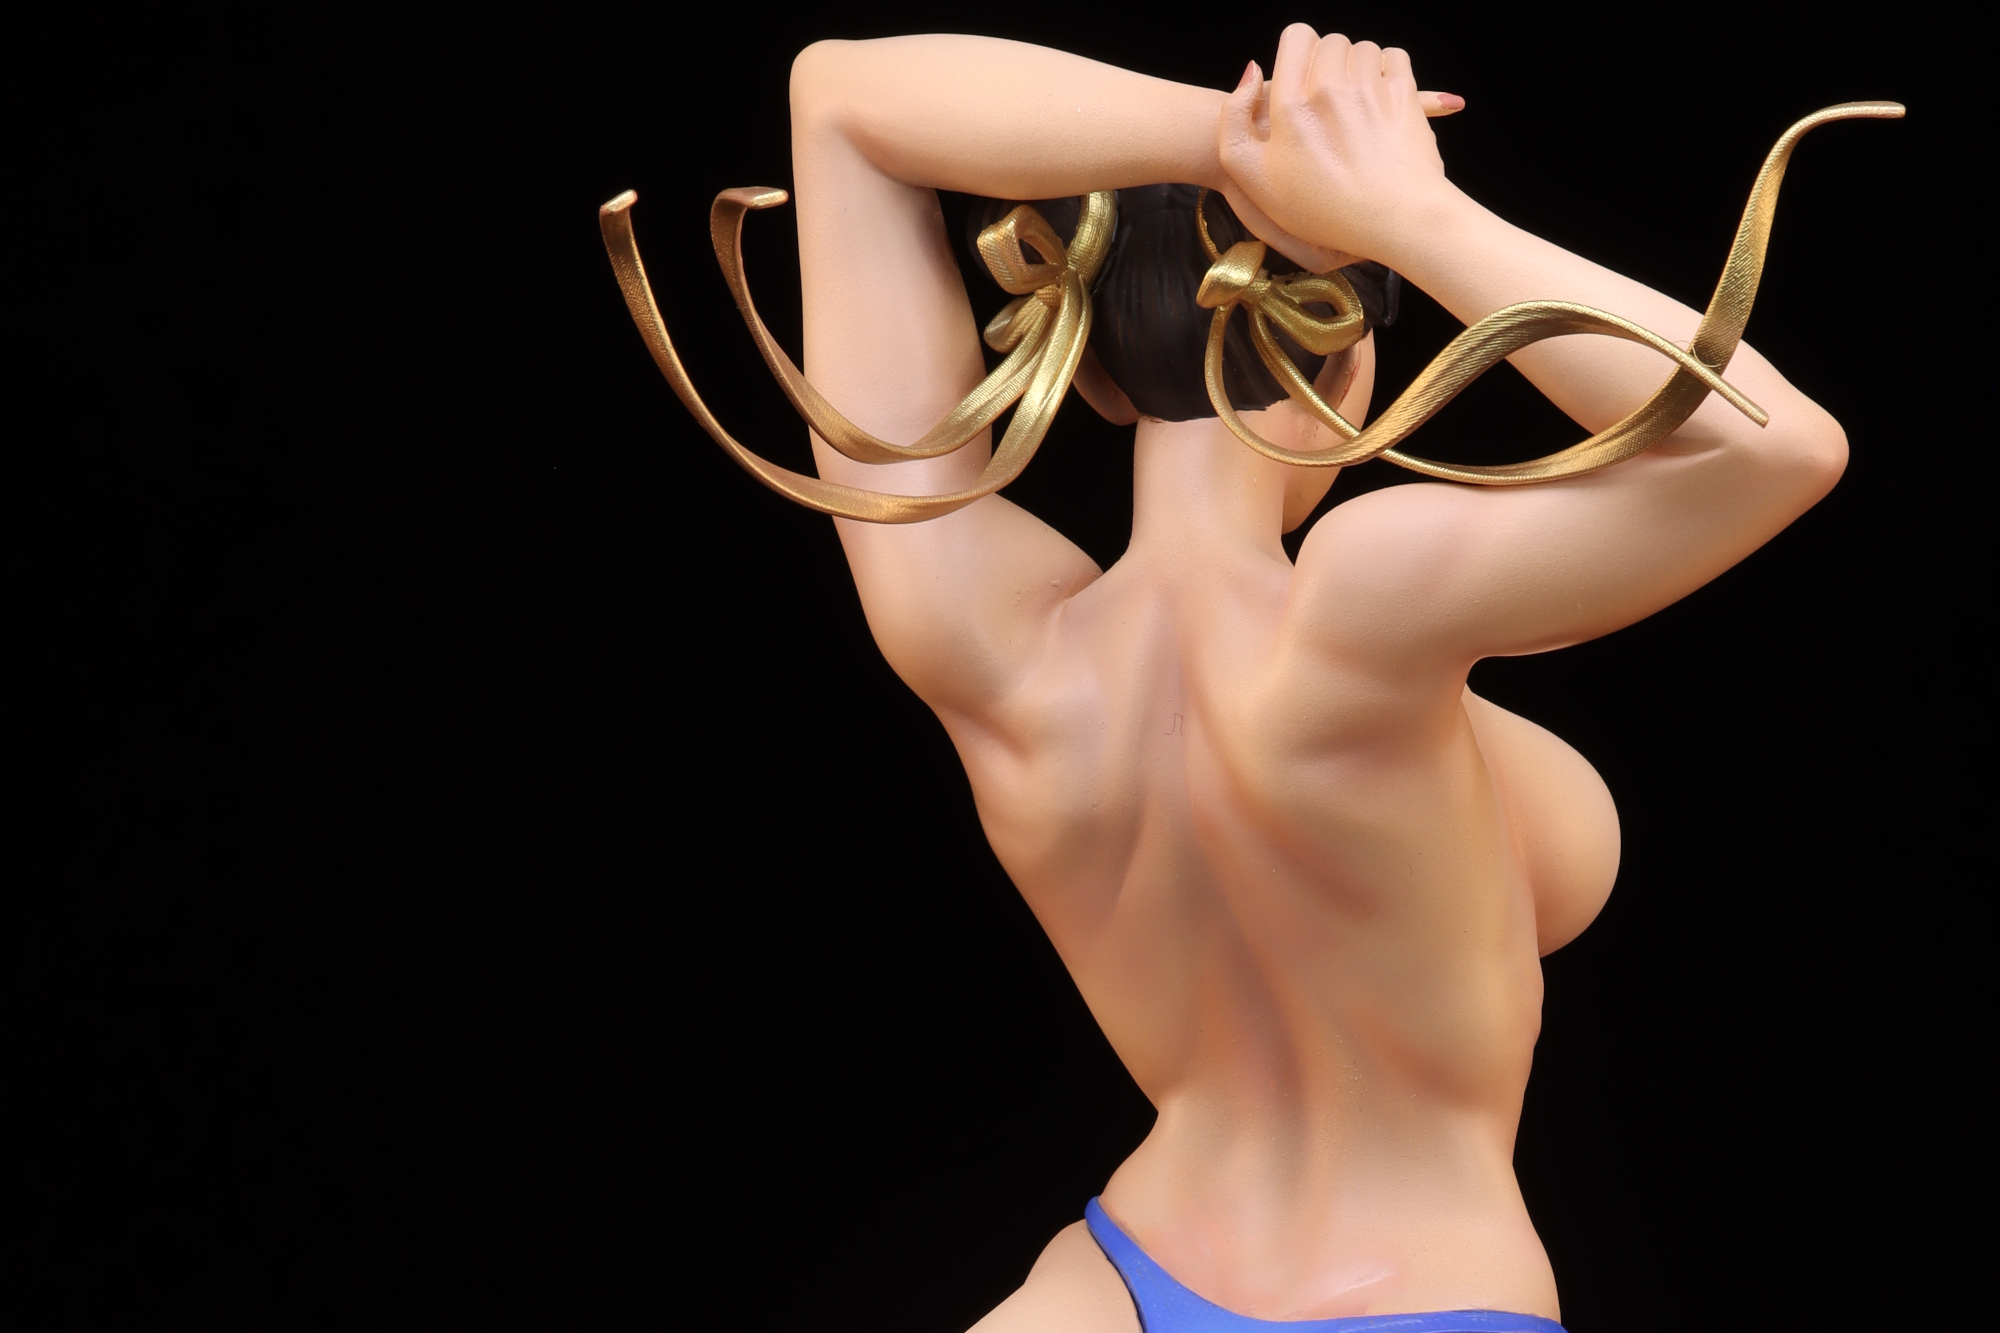
This was my 3rd 3D print and I wanted to continue to practice “realistic” skin tone again. I decided to try paint this almost nude print of Chun-li from ES Monster.
I decided to spend a bit more effort this time in fixing various defects on the print. The legs had a rather sizable gap when connecting to the rest of the torso, so I had to learn how to use polyester putty to fill it in. Mildcustom taught me to use Vaseline as a release agent so that the parts would be able to separate again with the putty only attaching to one part.
In the end it still wasn’t perfect, but after spending about 5-6 hours total just trying to fix them, I decided to move on and just paint up. I didn’t really test fit the hair buns and they didn’t really fit all that well in the end 🙁
Speaking of paint, painting this was a bit of a challenge. Being 1/6 scale and mostly skin tone, it had trouble fitting in my spray booth when fully assembled, and so I didn’t manage to capture most of the painting process. That and the difference in lighting between my spray booth, photobooth and natural lighting caused some rework after seeing it in various different conditions.
Things I learned on this project
- Skin tone needs some element of red / yellow / orange in it. I thought I could get away by omitting red and I ended up with a very one dimensional tone.
- Vaseline as a release agent for epoxy putty
- The “white dot” highlight on the eye is far more effective than doing a gloss over
- Shadows need to be very saturated or they look yuck. That’s why they usually go on last.
Skin Tone (Part 1)
Base skin tone – Mr Color Lasvicus Peach + bit of Orange + bit of blue
Base skin tone 2 – Base skin tone + Mr Color Lascivus Cocoa Brown + bit of orange
Shadow color – Base skin tone + bit of Purple + bit of Red
Nipple color – Shadow color + bit of Orange (ended up being somewhat of a salmony color)
Highlight color 1 – Lascivus Peach + bit of Orange + bit of blue. (same mix as base skin but more Lascivus Peach)
After this first session of painting skin tone, I was slightly disatisfied with the lack of depth in the tone itself. It looked okay in my spray booth as I was painting, but a tad too orangey and a bit too saturated especially in my photo booth.
Below is the same model under different lighting.
Natural light (outside)

Natural light 2 (inside)

Photo booth

Skin Tone (Part 2)
I decided to try correct the orangey look by spraying another layer of highlights onto the model. I started with white, added orange and red, then some blue to desaturate.
This fixed the orangey tone, but left the model with a rather pale look.
Highlight color 2 – White + bit of Orange + bit of Blue + bit of Red

Skin Tone (Part 3)
To fix some of the desaturation, I went back and did some light coats of another version of the skin tone. This also require reapplying some of the shadows, as they became a bit desaturated. I used a darker version of the skin tone by adding purple and bit of red, as well as Mr Lascivus Clear Red separately.
Also ignore the shinyness, I hit it with gloss at this stage to prepare it for painting the face and panties.
Base skin tone part 2 – Lascivus Peach + Orange + bit of Red + bit of Blue
Shadows 1 – Base skin tone part 3 + Purple + Red
Shadows 2 – Mr Color Lascivus Clear Red


Swimsuit Panties
Panties – Gaianotes Cobalt Blue base coat -> Finishers Foundation Blue highlight -> cover with Cobalt Blue

Hair
Since the torso is one piece from the panties up, I decided to hand paint the hair to reduce any risk of overspray ruining the skin.
Pro Acryl Black Brown base coat -> Pro Acryl Burnt Umber light streaks for highlights
Gloss coat, then a wet coat of GX 114 Super Smooth Matte.

Hair ribbon
Pink primer -> Mr Color Ultra Metallic Ultra Gold

Base
The base was a bit of an afterthought for me and I pretty much YOLO’ed it:
Base – Mr Color 528 IDF Gray / Mr Color 45 Sail Color
Highlight – Mr Color 318 Radome
Wash with Mr Weathering Color Sandy Wash
Gallery


