NSFW Warning below!
I’ve been on a 3D printing odyssey lately and I’ve finally finished my 2nd painted print! I was rather eager to finish this one and rushed it a bit, so there are quite a number of printing defects like gaps / print lines / support damage that I regretably neglected to fix, but I felt it necessary to close out this project.
Still, I learned alot during the process about support placement and how it affects parts going together. For example putting the supports on these mating surfaces or having them perpendicular to the build plate will cause them to misform ever so slightly and cause gaps. I’ve ordered some Milliput / polyester putty so that I can fill these gaps on my next project.
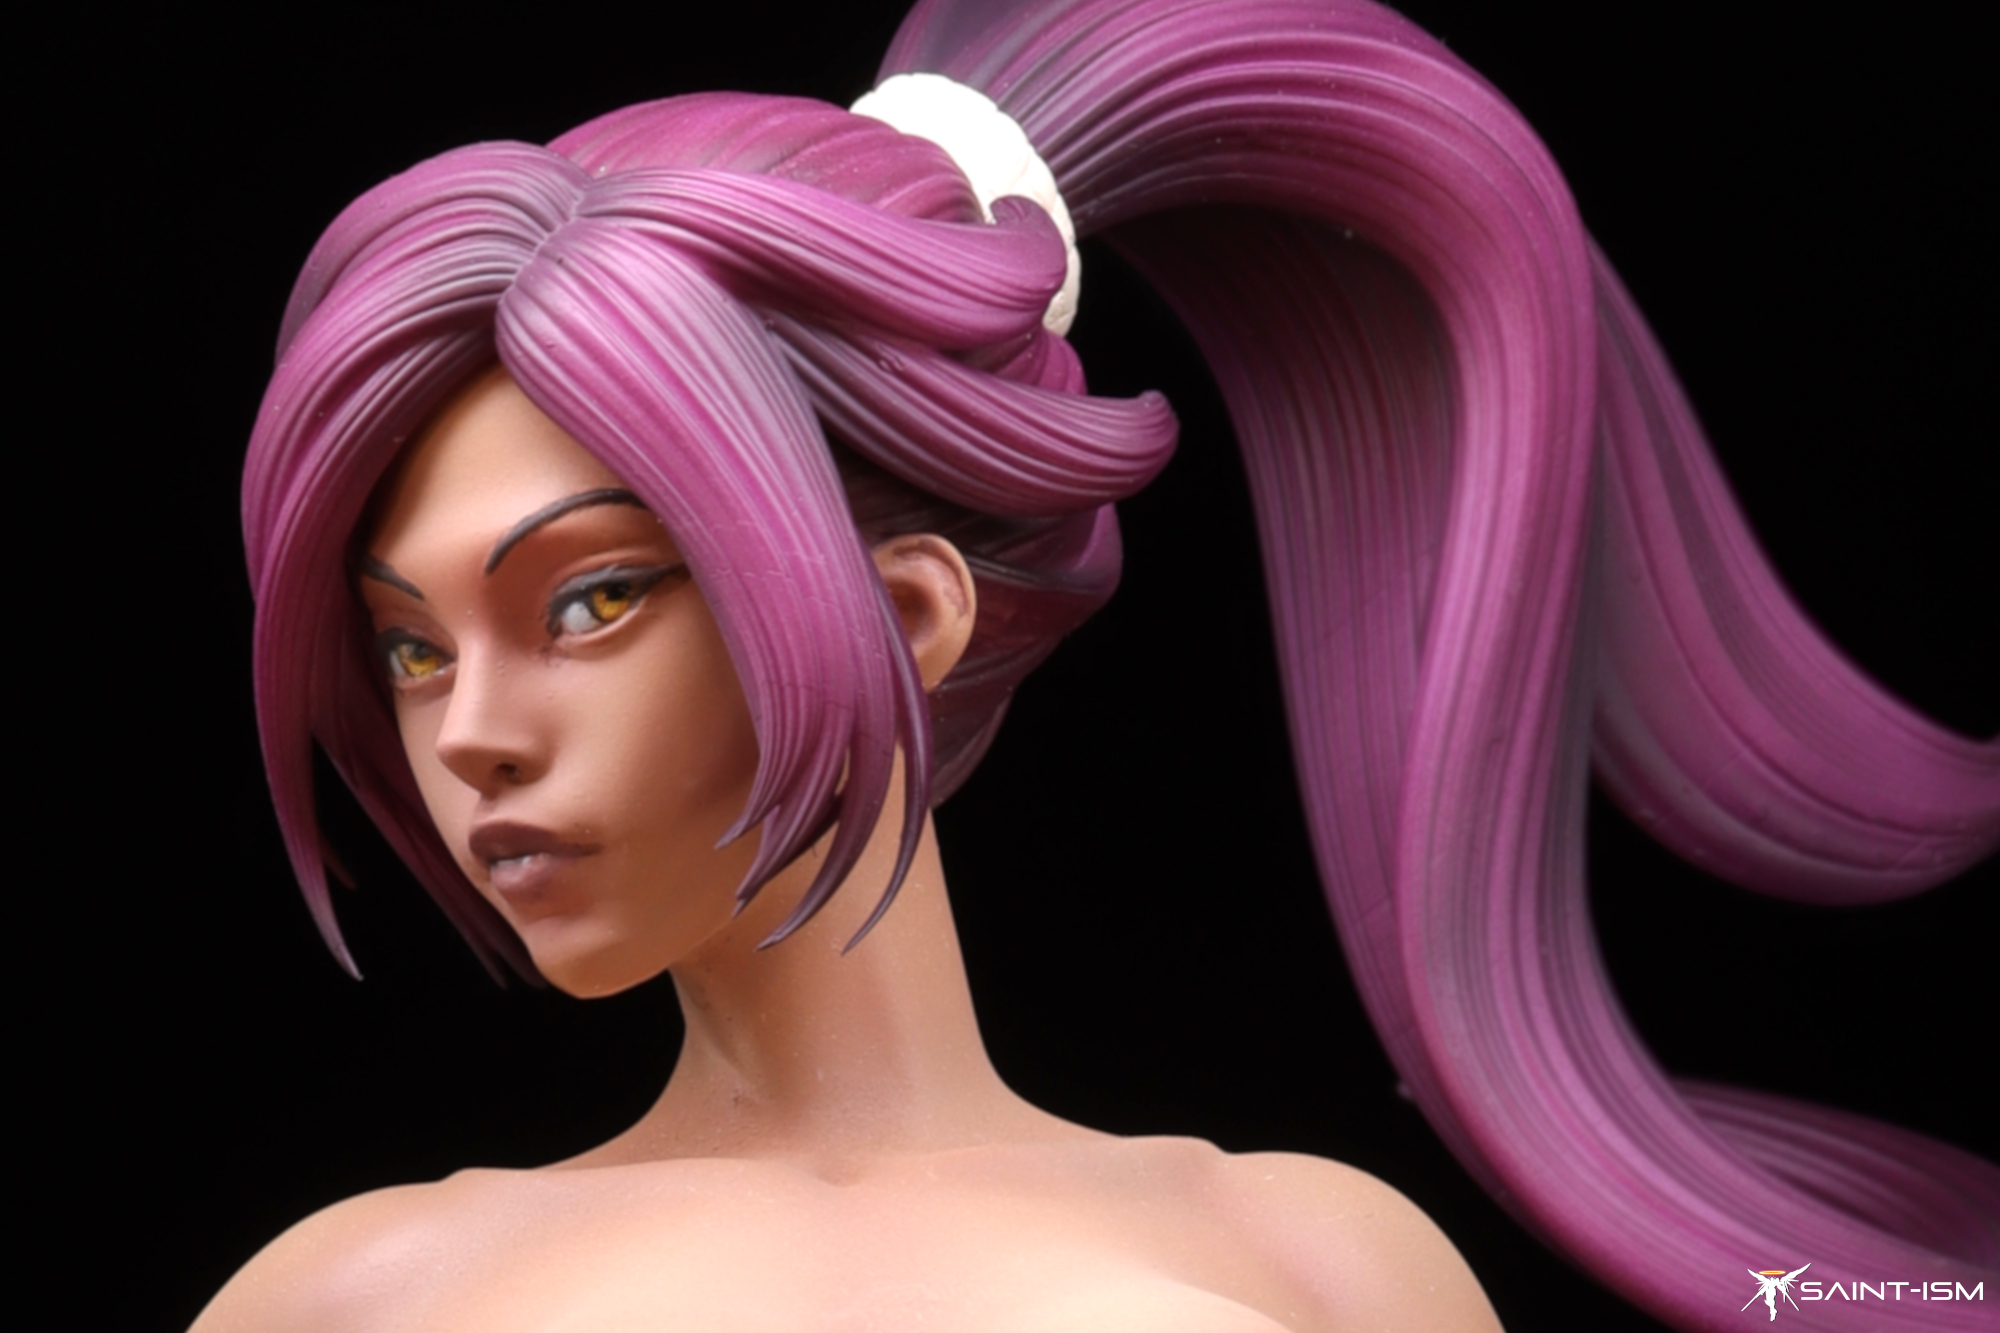
This was also my first time doing “realistic” eyes, and I think it went much better than the anime eyes. I used Pro Acryl paints, starting by filling the eye socket with black, then Vajello Sky Grey for the sclera, then mixes of Orange, Yellow to paint the iris. Unfortunately I didn’t manage to record this handpaint process, it took me about 3 hours to do 2 sets of eyes and I didn’t really do it in my usual painting area.
Anyway, I encountered huge issues trying to glue her together, I only had thin CA glue on hand, it didn’t really do a good job of bonding and also caused some of the paint to run causing a few repaints. I ended up having to create some putty glue by adding some baby powder.
Anyway hope you guys enjoy the photos and look forward to the next one!
Painting
Skin tone
Midtone – Mr Color Lascivus Cocoa Brown + Mr Color Orange + bit of Mr Color Red Brown
Highlight – Added to Midtone mix Mr Color Lascivus Peach + bit of Mr Color Orange Yellow
Shadow – Added to Midtone mix Mr Color Purple + Mr Color Red
Spray Midtone -> spray highlights -> spray shadows in recessed areas
Mr Color GX 114 to cover – using the dry spray method for super flat
Suit
Mr Color GX Black preshade -> cover with Mr Color Midnight Blue + Purple -> add white to mix and spray highlight
Hair
Mid tone – Mr Color Wine Red + Mr Color Purple + bit of Mr Color Green
Shadow – Add more green to Mid tone
Apply shadow color in recessed areas then cover with mid tone. Starter white on “highlight” areas and then re-cover with mid tone to create highlight effect
NSFW Warning below!


